Showing posts with label fall foods. Show all posts

Wednesday, January 19, 2011

Not all crostatas are created equal

It's been a while.

Christmas. New Year.  Food Poisoning. Starting a business.

And OOOOOH Honey.

If the holidays don't wear you out from cooking, the last two items in the last sentence will force you to take a break from getting crazy in the kitchen.  To clarify, the food poisoning was not the result of my cooking or for that matter, that of friends or family.  The  blame fell to the deli turkey from a local grocery store.  And alas, while the new business is not food-related, it is keeping me mighty busy and feeling challenged again in my professional life.

But now I am back!

I did a decent amount of cooking over Christmas though nothing like the Thanksgiving extravaganza.  My cooking exploits had mixed results.  I tried making cinnamon rolls for the first time and found out just how temperamental yeast can be.  Apparently, my beloved kitchen may not be the right incubator for yeast to do what it should do: rise!  After two rounds of making dough, including once at 10 pm on Christmas Eve, I realized I had killed my yeast.  I forged on and still made the rolls the next morning.  They turned out like little flat hockey pucks.  But let me tell you, ain't nothing that a pound of butter and cinnamon can't make better!  Flat or not, they were delish.  Anyway, when I can figure out how to get the dough to rise, I'll post the recipe.

In the meantime, I also learned that not all crostatas are created equal.  In the fall, I made a divine pear and fig crostata.  I mean, this dessert made my toes curl it was so good.  And it was so easy to make.  Easy crust with no dough drama.  Delicious filling with the slightly exotic flavor of cardamom.

So why did I not make this again for Christmas?  Good question.

I decided to use a different crostata recipe for my Christmas dessert.  It was an apple crostata and unfortunately, it was a mess.  It turned out okay once it was baked but it was a rocky road to making it look nice.  The dough was next to impossible to work with.  It was like a triage station in the kitchen on Christmas day as I tried to patch the dough of the crostata together to hold the filling in.  The finished product was ... well, fine.  But not the rock star quality of the crostata from the fall.

Try this absolutely divine pear and fig crostata.  I don't know if it is the cardamom or the way the crust gets golden brown because you brush it with heavy cream but everything about this dessert was perfect.  It is the ideal dessert to serve for a dinner party on a cold winter night.

Pear and Fig Crostata
The finished product in all it's golden brown, bubbly filling goodness glory!

Ingredients

Crust
1 2/3 cups unbleached all purpose flour
1/3 cup cornmeal
2 tablespoons sugar
1 teaspoon salt
3/4 cup (1 1/2 sticks) chilled unsalted butter, cut into 1/2-inch cubes
3 tablespoons (or more) ice water

Filling
1/4 cup (packed) golden brown sugar
1/4 cup sugar
2 tablespoons cornstarch
1 teaspoon (scant) ground cardamom
1/4 teaspoon ground cloves
1/4 teaspoon coarse kosher salt
2 1/4 pounds firm but ripe unpeeled Anjou pears (about 4), cored, each cut into 8 wedges
10 dried but moist Calimyrna figs (about 4 ounces), stemmed, quartered
Heavy whipping cream (for brushing)
Raw sugar
2 tablespoons honey

Details

For the crust:
Blend first 4 ingredients in processor. Add butter; using on/off turns, process until mixture resembles coarse meal. Remove lid; spoon 3 tablespoons ice water over mixture. Return lid to processor; using on/off turns, blend mixture until dough forms ball, adding more ice water by teaspoonfuls if dry. Flatten dough into disk; wrap in plastic and chill at least 20 minutes. 


For the filling:
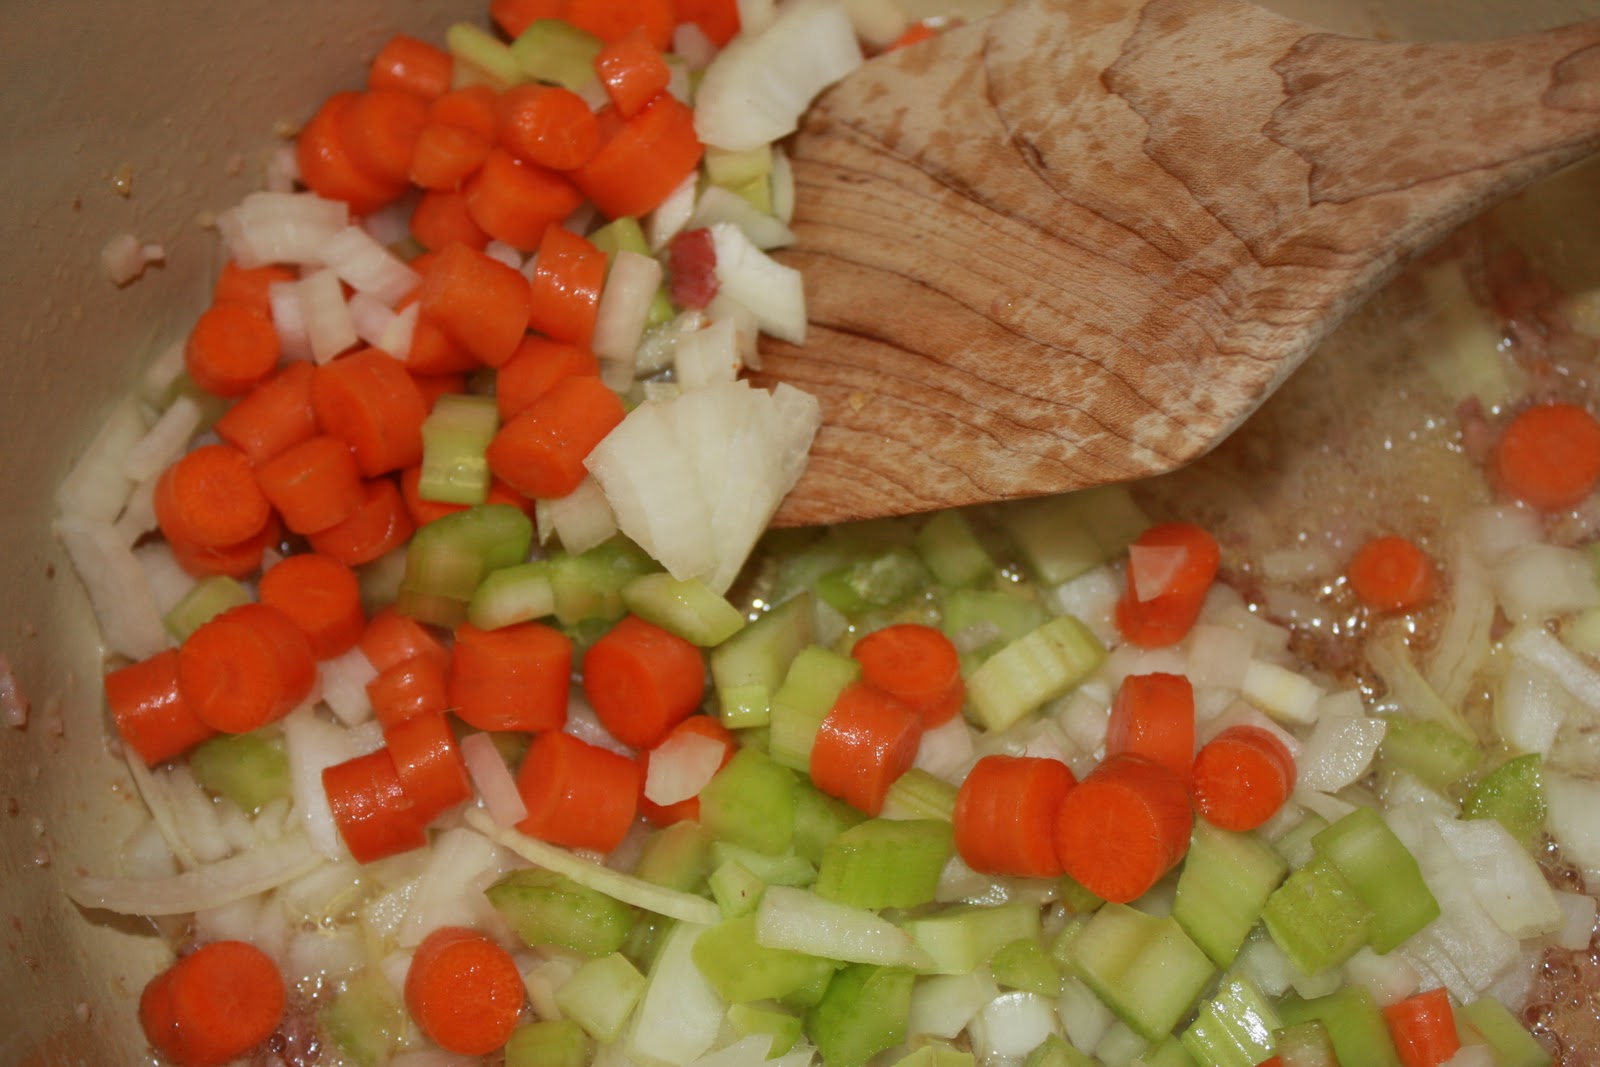
Position rack in center of oven; preheat to 400°F. Whisk first 6 ingredients in large bowl. Add pears and figs; toss gently. Roll dough out on lightly floured parchment to 14-inch square or round. 

  • The fig and pear mixture in the rolled-out crostata crust.
    Transfer parchment with rolled-out crust to a baking sheet. Mound pear mixture with juices in center of crust, leaving 2- to 3-inch plain dough border. Using parchment as aid, fold dough up over edges of pear mixture, pleating edges and pinching to seal any cracks in dough, forming square or round. Brush crust edges with cream; sprinkle generously with raw sugar.
  • The crostata pre-baking with the sides pulled up around the filling and the outside brushed with heavy cream and sprinkled with raw sugar.
    Bake crostata until crust is golden, pears are tender, and juices are bubbling thickly, covering crust edges with foil if browning too quickly, 50 to 60 minutes. 

    Remove crostata from oven; drizzle 2 tablespoons honey over hot filling. Run long thin knife or spatula around edges of warm crostata to loosen. Cool crostata on parchment on baking sheet until slightly warm, at least 1 hour. Transfer to platter. Serve slightly warm or at room temperature.

Recipe courtesy of Bon Appetit

Tuesday, November 23, 2010

A stretchy pants worthy Thanksgiving feast

Since moving into our new home in Washington, DC last week, my family of three has been settling in, unpacking boxes and hanging pictures in preparation for celebrating the holidays in our new digs. As if becoming first-time homeowners isn’t exciting enough, we are hosting our first Thanksgiving dinner which has left me in a state of unadulterated, total foodie happiness. I’ve been planning the details for weeks and plotting my cooking schedule vigilantly. The grocery shopping started last week. I took Davis with me to buy our first round of Thankgiving ingredients and most importantly, our first turkey. We walked away with a monster turkey and my little boy grinning ear-to-ear as he looked at the frozen bird in our cart.

In fact, why am I blogging right now and not cooking?

Thanksgiving was always my dad’s favorite holiday probably because it was a day devoted to eating.

And eating.

And then eating some more.

In fact, he even had special pants he wore on Thanksgiving. He would pull out his favorite “stretchy” pants (worn with a sweater and collared shirt of course), buried in his closet from the last Thanksgiving and sigh with happiness knowing that a food fiesta awaited. He could rest assured that his favorite “stretchy” pants would not fail him as the waist band could expand as he ate with abandon and pure joy.

You can imagine that I am wishing my dad was here to celebrate the first Thanksgiving in our new house and the first Thanksgiving dinner I am cooking. I know he would have been in the kitchen “sampling” along with Dan and Davis as the cooking went on Wednesday into Thursday. He would have supervised the roasting of the enormous turkey from the living room while watching football and cursing the Cowboys.

So I am setting out to make my dad proud and cooking a “stretchy” pants worthy Thanksgiving dinner.  I won't lie either; I am considering resurrecting my old maternity pants with the elastic waist-band from the attic.

I’ll be sure to post pictures of the food right after Thanksgiving but for now, here is my menu for the big day. I’ve made most of these recipes before with the exception of the salad. A lot of them are adapted or taken straigh from my favorite food magazines.  I like to experiment but I feel like Thanksgiving is not a time to mess around and potentially have a kitchen debacle. 

Back to cooking!  I may even try to brine my turkey if the big bird unthaws in time. Oh, so much to look forward to in the next 48 hours! Am I a nerd that I am excited to brine a turkey? Of course I am.  Oh well, so be it.

The kitchen can't handle me right now!

Colleen’s Thanksgiving Day Menu
(Any dish with an asterisk has a recipe included below)

First Course
Butter lettuce, Apple, Mandarin Orange, Pomegranate and Candied Walnut Salad **

Main Course
Hello?! Of course, it’s TURKEY!

Side Dishes
Homemade Simple Stuffing **
Sweet Potatoes with Butter and Brown Sugar
Mashed Potatoes (use a potato ricer ... you will have the smoothest potatoes EVER!)
Cranberry Sauce **
Parker House rolls
A fabulous vegetable dish courtesy of my dear friend C.

Desserts
Confession: with so much cooking to do, a toddler to chase after and guests to entertain, I am buying pre-made crusts ... yes, you read that correctly)

Perfect Pumpkin Pie **
Pecan Pie **
Pumpkin Bread Pudding with Caramel Sauce **
A non-traditional Thanksgiving dessert, Mocha Cake, courtesy of my dear friend C. because hey, everyone needs chocolate, even on Thanksgiving!

Wine
Beaujolais Nouveau ( a nice young red that goes beautifully with the whole meal ... though I am not a sommelier but in my humble opinion it is pretty darn good)
Diet coke (yes, I don't give it up for Thanksgiving)

RECIPES

Butter lettuce, Apple, Mandarin Orange, Pomegranate and Candied Walnut Salad
(serves 6)

Ingredients
1/2 cup extra-virgin olive oil
1/4 cup fresh lemon juice
1 shallot, minced
1/2 teaspoon grated lemon peel
1 8-ounce Fuji apple, halfed, cored, cut into matchstick-size strips
6 cups butter lettuce
6 mandarin orange slices, peeled
Pomegranate seeds
Candied walnuts

Details
Whisk first four ingredients in a small bowl. Season dressing with salt and pepper. Place apple in medium bowl and mix in 3 tablespoons of dressing.

Place butter lettuce in large bowl.  Add apples.  Toss, adding more dressing to taste.  Divide salad among 6 plates.  Garnish each with 1 mandarin orange slice and sprinkle with pomegranate seeds and candied walnuts.

Recipe adapted from Bon Appetit, September 2004

Homemade Simple Stuffing
(serves 8-10)

Ingredients
1 stick butter
1 large onion, diced
1.5 cups celery, diced
12 cups bread cubes, cut in 1/2 inch cubes and toasted
1.5 teaspoons salt
1/4 teaspoon black pepper
1 tablespoon dried sage
1 tablespoon thyme
1 cup chicken stock

Details
Toast bread cubes in oven until light brown.

Melt butter in a medium saute pan.  Add onion and celery and cook until tender. 

In a large bowl, place the toasted bread cubes and mix in the onion and celery.  Add salt, pepper, sage and thyme and toss until mixed.  Add chicken stock and toss until blended.

Place stuffing in lightly greased casserole dish and bake at 325 degrees until heated through about 30 minutes.

Cranberry Sauce


Ingredients
12 oz bag fresh or frozen cranberries
1 cup water
1 cup sugar
1/2 teaspoon orange zest

Details
Place water and sugar in a sauce pan and boil until sugar dissolves.  Add cranberries and cook over medium heat until cranberries pop.  Stir in orange zest and cool.

The sauce can be made up to 2-3 days ahead of tie.

Perfect Pumpkin Pie
(serves 8 to 10)
**Please note I am using a pre-made crust this year

Ingredients
9-inch pie crust
1 (15-ounce) can pure pumpkin (I like the Libby's brand)
3/4 cup (packe) golden brown sugar)
3/4 teaspoon ground cinnamon
3/4 teaspoon ground ginger
1/4 teaspoon nutmeg
1/4 teaspoon salt
Pinch of ground cloves
3 large eggs
1.25 cups heavy whipping cream

Details
Cook pie crust according to directions.

Puree pumpkin in food processor.  Mix in next 6 ingredients.  Add eggs 1 at a time, pulsing after each addition.  Gradually add cream, processing just until blended.  Process 5 seconds longer.

Pour filling into warm crust.  Bake at 350 degrees until center is set, about 1 hour.  Cool completely on rack.  This pie can be made 1 day ahead.  Cover and chill.

Recipe courtesy of Bon Appetit, November 2006

Pecan Pie
(serves 8)
**In the past, I have doubled the filling for this so that the pie is heaping with pecans.  The recipe below is for a single round of filling but feel free to double.  I think it makes the pie much better.

Ingredients
9-inch pie crust
3/4 stick unsalted butter
1.25 cups packed light brown sugar
3/4 cup light corn syrup
2 teaspoon pure vanilla extract
1/2 teaspoon grated orange zest
1/4 teaspoon salt
3 large eggs
2 cups pecan halves (1/2 pound)

Details
Cook pie crust according to directions.

Preheat oven to 350 degrees.

Melt butter in a small saucepan over medium heat.  Add brown sugar, whisking until smooth.  Remove from heat and whisk in corn syrup, vanilla, zest and salt.  Lightly beat eggs in a medium bowl, then whisk in corn syrup mixture.

Put pecans in pie shell and pour corn syrup mixture evenly over them.  Bake on hot baking sheet until filling is set, 50 minutes to 1 hour.  Cool completely.

Pie can be baked 1 day ahead and chilled.  Bring to room temperature before serving.
 
Recipe courtesy of Gourmet, November 2009

Pumpkin Bread Pudding with Caramel Sauce
(serves 6)

Ingredients
Bread Pudding
2 cups half and half
1 15-ounce can pumpkin
1 cup (packed), plus 2 tablespoons dark brown sugar
2 large eggs
1.5 teaspoons pumpkin pie spice
1.5 teaspoons ground cinnamon
1.5 teaspoons vanilla extract
10 cups 1/2 inch cubes egg bread (about 10 oz)

Caramel sauce
1.25 cups (packed) dark brown sugar
1 stick unsalted butter
1/2 cup whipping cream

Powdered sugar

Details
For Pumpkin Bread Pudding:
Preheat oven to 350 degrees.  Whisk half and half, pumpkin, dark brown sugar, eggs, pumpkin pie spice, cinnamon and vanilla extract in large bowl to blend.  Fold in bread cubes.  Transfer to 11x7 inch glass baking dish.  Let stand 15 minutes.  Bake pumpkin bread pudding until tester inserted in center comes out clean, about 40 minutes.

For caramel sauce:
Whisk brown sugar and butter in saucepan over medium heat until butter melts.  Whisk in cream and stir until sugar dissolves and sauce is smooth, about 3 minutes.

Sift powdered sugar over bread pudding.  Serve warm with caramel sauce.

Recipe courtesy of Bon Appetit, November 2000

Monday, November 22, 2010

A soup to exist on

I fall into the category of people who could exist on soup. Not a watery, sad can of Campbell’s soup with mystery meat they call chicken but rather hearty, homemade concoctions packed with vegetables.

If you are following Weekend Gourmet, you’ve seen a few of my favorites like Perfect Chicken soup, Lentil soup and Tortilla soup. These have been in my soup repertoire for a few years but this fall, I decided to experiment with a few new soups to change things up.

Without further ado, please welcome Potato Pancetta soup to the blog. I could exist on this soup.  The broth alone, which is enriched with the smoky flavor of pancetta, is to die for.

Cream of Potato soup has always been one of my favorites. In my opinion, this perfectly lovely soup has been bastardized by chain restaurants into a clumpy mess most commonly called Baked Potato Soup. Now, I am not one to hold back when it comes to adding cream to soup but seriously, the most commonly found version I alluded to is like a heart attack in a bowl. And the worst part is, it’s not even that good! The potatoes get lost in a mess of gloppy cream and there isn’t any complex flavor to the broth.

On Sunday, I set out to create the perfect potato soup. I started by melting butter in my favorite soup pot along with two cloves garlic that I minced and half of an onion, chopped. To the browning garlic, I added five slices of pancetta which I had chopped to smithereens. This was a nice way to take out some post-election aggression.
 There is no better smell than that of pancetta browning in a pan with garlic and onion. My mouth was watering about two minutes into this new recipe which couldn’t be a bad sign.
Then, I added in carrots and celery and sautéed the mixture until the vegetables started to soften.

Next to the pancetta, the main star of this dish would be the buttery yukon gold potatoes.

I peeled (okay, I missed a few spots here and there because I absolutely detest peeling potatoes) and diced five to six potatoes. Then, I added them to the vegetable and pancetta mixture and threw in one teaspoon of salt and half a teaspoon of ground black pepper.

Finally, I added one and a half containers of chicken broth. I prefer the Progresso brand (low sodium) if I don’t have time to make my own.

Let the soup simmer on the stove and once the potatoes are soft, strain out half the potatoes from the soup and place in a small bowl. To the potatoes, add one cup of whole milk. Mash the potatoes in the milk. Then, add the mixture back to the rest of the soup. You are left with a pot of creamy potato and pancetta goodness.

Can life get any better? Not really.

Perfect Potato Pancetta Soup
(serves 4-6)

Ingredients
2 tablespoons butter
2 garlic cloves, minced
1/2 yellow onion, diced
5 slices pancetta, finely chopped
2 celery stalks, chopped
3/4 cup carrots, chopped
5-6 yukon gold potatoes, diced
1 large container chicken broth (add another half of a container of broth if you want a thinner soup)
1 cup whole milk

Details
Place a large soup pot over medium heat and melt butter.  Add garlic, pancetta and onion and cook until lightly browned.  Add carrots and celery and cook until slightly tender.  Add diced potatoes to the mixture.

Add chicken broth.  Allow soup to cook over medium heat until potatoes are soft.  Once soft, strain half of the potatoes (there may be some of the other ingredients mixed in and this is okay) and place in a medium bowl.  Add milk to the mixture and mash. 

Return the mashed mixture to the remainder of the soup in the pot and stir.  Cook for five more minutes and serve.

Thursday, October 28, 2010

On sympathy carbo-loading (a.k.a. gratuitous carb consumption)

For many years, the arrival of fall meant the anticipation of race day for whatever marathon I was running that year and, most importantly, carbo-loading. For several years, I was one of those crazy people who thought running 26.2 miles for fun was enjoyable.

Turns out, my hip flexors didn’t find the same enjoyment. After my eighth race, I have hung up my sneakers for a bit. A couple weekends ago, with the Marine Corps marathon approaching in my city, I was having marathon envy. Other than the high of crossing the finish line intact and knowing a humongous diet coke and Swedish fish were awaiting me, the best part of the lead-up to marathon day for me was always carbo-loading.

Carbo-what you ask?

That’s right, for one week every year I would eat as many carbs as I wanted to help fuel my system through the upcoming race. Now, complex carbs are recommended but damn, if I was running a marathon, I was having whatever carbs I wanted as a reward.

There were a lot of moving parts involved in running marathons and my mom and dad were there every step of the way.  Including, for the eating leading up to the race.  They were loyal spectators –okay, groupies-- at all my races. And being a groupie ain’t all it’s cracked up to be, even if it’s for your own child.

Being part of my marathon posse meant schlepping with me to the starting line of my first race in Chicago on a very cold and blustery morning and traipsing all over the city in the cold to see me at various mile markers. It also meant getting up at 3:30 am with me to catch the bus to the starting line of the Disney Marathon on a chilly January morning in Orlando. Not sure that was the “Happiest Place on Earth” that morning.
Bleary-eyed with my dad at the Disney Marathon before heading to the starting line.
But my parents did it with a smile. And signs. Lots of signs that said “Run, Little Flower, Run.” My dad was not shy about advertising my nickname.

Being my marathon groupies also meant that my parents joined me for the massive carbo-loading dinners on the eve of race day. As you may have gathered, my dad loved nothing more than to eat. Gosh, he would have been a good marathoner because he could carbo-load with the best of ‘em.

It was at the carbo-loading dinner before the Disney Marathon in 2001 that my dad coined a term non-marathoners and anti-Dr. Atkins folks all over the world should embrace and adopt.

After two huge bowls of pasta from a huge buffet of every kind of pasta and sauce imaginable and a huge pile of bread, I put my fork down and said UNCLE. Same for my mom. My dad sat at the table looking a bit full but not quite and with a twinkle in his eye asked me if he thought it was okay for him to keep eating even if the marathoner had stopped. Before I could answer he said, “Oh what the hell, I am sympathy carbo-loading for you, Little Flower! I’m going back for another round.”

Sympathy carbo-loading!? Right on, Dad!
My mom and I couldn’t stop laughing as my dad lurched toward the buffet and proudly told everyone that he was “sympathy carbo-loading because did you know my Little Flower is running the race tomorrow?”

Earlier this month with marathons on the brain, I decided to sympathy carbo-load as well for all my friends running races this month. Well, um, actually, I don’t really know anyone running. To be honest I really just needed some gratuitous carbs. BAD. And that’s why I made pumpkin biscotti with a cinnamon glaze.

The biscotti are incredibly easy to make. Simply combine the dry ingredients in one bowl, the wet ingredients in another and then combine the wet to the dry. I suggest dusting your hands with flour before combining the two as the dough will get sticky as you mix it together using your hands. The flour will keep most of the dough from sticking to your hands.

On a baking sheet and with the oven heated to 350 degrees, I arranged the dough in two loaves on a silpat mat.

After baking the biscotti for 30 to 40 minutes Bake for 30-40, I removed the biscotti from the oven and cooled until just slightly warm. Using a serrated knife (I recommend this one), I cut the biscotti into 1 inch wide pieces and laid each piece flat on the silpat mat. Then, I turned the oven down to 300 degrees and baked the biscotti for an additional 15-20 minutes. This will ensure they start to harden a bit to give you that nice crunch that really good biscotti have.

While the biscotti were cooling, I mixed up the cinnamon glaze which is very simple to do. Once the biscotti cooled, I dipped a spoon in the glaze and drizzled it over the biscotti.
The finished product
I pulled Davis in to the sympathy carbo-loading once he woke up from his nap. It’s never too early to start training.

Pumpkin Biscotti with Cinnamon Glaze
(Makes 25-30 biscotti)

Ingredients
For the biscotti:
2 1/2 cups flour
1 cup sugar
1 teaspoon baking powder
1 teaspoon cinnamon
1/2 teaspoon nutmet
Pingch of ginger
Pinch of cloves
Pinch of salt
2 eggs
1/2 cup pumpkin puree
1 teaspoon vanilla extract

For the glaze:
1/2 cup confectioners' sugar
1 tablespoon milk
1/2 teaspoon cinnamon

Details
Preheat oven to 350 degrees.  Sift together flour, salt, sugar, baking powder and spices in medium bowl.

In another bowl, whisk eggs, pumpkin, and vanilla extract.  Pour the pumpkin mixture into the flour mixture.  Lightly dust your hands with flour and use your hands to incorporate the ingredients or use a medium spatula.  Dough will be crumbly once it is ready to be baked.  Knead dough gently in the bowl.

Deposit dough on silpat-lined baking sheet (or use parchment paper if you don't have a silpat mat.  Form the dough into two loaves.  They should be fairly flat and about 1/2 inch high.  Bake for 30-40 minutes or until center is firm to the touch.

Remove from oven and let biscotti cool.  Once cool enough that you can touch, using a serrated knife, cut into 1 inch wide pieces and lay flat on the baking sheet.  Turn the oven down to 300 degrees and bake for an additional 15-20 minutes.  Cool completely.

While biscotti are cooling, mix powdered sugar, milk and cinnamon in a small bowl with a whisk or fork.  Mix until smooth.  Dip a spoon in the glaze and drizzle glaze over biscotti.

Recipe adapted from Simply Recipes

Thursday, October 14, 2010

Zuppa and Lucca

Almost four years ago when my husband and I set out for Italy on our honeymoon, I had no idea the adventure and gastronomical delights that awaited us.

And Italy didn't disappoint on either count.

We started out our honeymoon in Rome, seeing the major sights and settling into large lunches every afternoon where we occasionally ended up with three entrees instead of two. Damn that language barrier ... but not really since it worked to our advantage enabling us to sample more of the local delicacies.
Lunch in Roma circa November 2006.
Lunch was capped off by my daily visit to a gelateria. Occasionally, I even had gelato for dinner.  Is there anything more gluttonous?  After several days in Rome, we drove into Tuscany to a beautiful villa that was awaiting us.

There was only one problem.

The villa didn’t exist.

Details, details.  (It's a long story and if you're ever over for dinner, we'll recount it for you but for now, back to the blog post.)

Ah yes, an early test for our very young marriage. After driving around for two hours looking for the villa and discovering it did not exist, we headed back in the direction we had come from trying to re-calibrate our plans.

We rebounded nicely and settled in the charming small town of Lucca for two days as we figured out our game plan for the rest of the honeymoon. I also introduced Dan to a McCarthy family rule of thumb: when all else fails, EAT!

And so we found ourselves in a small trattoria in Lucca for dinner after a very long day of driving on Italian roads with me navigating which was a debacle in and of itself given my very poor map-reading abilities. It was a slightly chilly November night and the restaurant was bustling with families and young couples. At this point, I think we were both a bit homesick for the States given our tough day.

As I eyed the menu, my eyes lit up when I discovered Zuppa di Lenticchie on the menu. Lentil soup!  My mom makes the most wonderful lentil soup and a bowl of it was just what I needed to put the day behind me and make me feel at home in this town we hadn't expected to be in.

The soup was divine.  It was thick and stew-like.  The lentils were cooked perfectly and the soup smelled and tasted of herbs including rosemary, just like my mom's.  I can't even tell you what the rest of the meal consisted of because I was so taken by the soup.

As it turned out, that dinner was the start to a terrific two days in a town we would have never visited but for our villa catastrophe.  I credit the Zuppa for getting us back on the right track.
A bowl of Zuppa di Lenticchie alla Diane I made recently.

Zuppa di Lenticchie alla Diane
This soup freezes well and is delicious on a cool, fall or winter's day.

Ingredients:
2 celery stocks, diced
1 medium onion, chopped
1 garlic clove, minced
2 tablespoons butter
1 large container Chicken Broth
1 28 oz can of diced tomatoes, undrained
3/4 cup dry lentils, rinsed
3/4 cup barley
1/2 teaspoon dried oregano
1/2 teaspoon dried rosemary crushed (you can use fresh if you want)
1/4 teaspoon pepper
1 cup sliced carrots
3/4 cup parmesan cheese

Details
*In a large soup pot, melt the butter and saute the celery, onion and garlic until tender.
*Add the chicken broth, tomatoes, lentils, barley, oregano, rosemary and pepper, bring to a boil.
*Reduce heat, cover and simmer for 40 minutes or until lentils and barley are almost tender.
*Once cooked, you can garnish each bowl of soup with parmesan cheese if desired.

Thursday, September 16, 2010

Perfect Chicken Soup for all Ages

A bowl of Perfect Chicken Soup.
I have been exalting the cooler weather and the imminent arrival of Fall.  Unfortunately, cooler weather also brought our version of the plague to my house this week.  My son, Davis battled a nasty cold and since he likes to share (I know, what a sweet boy), my husband, Dan, has also acquired the beginning of a cold.  This left me feeling bad for my boys last night and wanting to make a warm, comforting meal for both of them.

A few years back, my mom shared with me a recipe for what I think is the perfect chicken soup.  If you are like me, you probably turn your nose up at the chicken soup sold in stores with the chicken that appears to be of questionable origins and is so salty that you probably fulfilled your daily sodium intake for a week after one bowl of soup.  I will fully admit that I am a bit of a chicken soup snob and so making the soup (almost) from scratch is my preference. 

This recipe could not be more simple and the outcome is delicious.  It's a great recipe for the weekend but also quick enough for preparation during the work week.  With a cup of brown rice, a cup of chopped carrots, one diced medium yellow onion, three to four stalks of celery chopped, low-sodium chicken broth, three chicken breasts and celery salt, you will have the most perfect chicken soup.

I pre-heated the oven to 350 degrees and baked the chicken breasts in a bit of olive oil for 30 minutes.  While the chicken cooked, I added my chopped vegetables to my soup pot and cooked them in a bit of butter to soften them up.  I then added chicken broth to the pot, chopped the cooked chicken into pieces and added it to the soup along with the brown rice.  I seasoned the soup with a bit of salt and pepper and added celery salt.  After about 45 mins to one hour, the soup was ready to eat.

Davis and Dan loved the soup and we went to bed with full tummies and feeling better, as only a homemade bowl of chicken soup can make one feel.

Perfect Chicken Soup

Ingredients
*2 containers chicken broth (I like Progresso's reduced-sodium chicken broth)
*1 cup chopped carrots
*3-4 stalks of celery, chopped
*1 medium yellow onion, chopped
*1 cup brown rice
*3 boneless, skinless chicken breasts
*1 teaspoon celery salt
*Salt and pepper to taste
*1 tablespoon butter

Details
*Preheat oven to 350 degrees.
*Place chicken breasts in a baking dish with a bit of olive oil in the bottom. Salt and pepper the chicken and bake for 30 minutes or until cooked through.
*Melt one tablespoon butter in a soup pot (I like the Le Creuset dutch oven).  Add chopped carrots, celery and onion to the pot.  Cook until slightly softened.
*Remove chicken from oven and cut into bite-sized pieces and add to the vegetable mixture in the pot.
*Add one cup of brown rice to the chicken and vegetable mixture.
*Add chicken broth to the chicken and vegetables.  Add 1 teaspoon celery salt.  Salt and pepper to taste.
*Cook covered on medium heat for 45 minute to one hour or until vegetables are tender and rice is cooked.

Tuesday, September 14, 2010

Operation Pumpkin Indoctrination


Like so many of you, I was a fan before it became cool and everybody was seeking it out.

What, you may ask, am I speaking of?

Skinny jeans?

No.

Ballet flats?

No.

Lady GaGa?  Cosmospolitans?

No and No.

Pumpkin?

Yes!

Before Starbucks made pumpkin cool to eat on days other than Thanksgiving and in items other than pumpkin pie by serving the pumpkin spice latte, pumpkin scone, pumpkin cream cheese muffin or pumpkin bread, I was obsessed.  I could have eaten just pumpkin pie at Thanksgiving and been perfectly happy without the turkey or the other dishes.

The proliferation of pumpkin to the reaches of the coffee counter and bakery case at Starbucks and beyond has only fueled my obsession and made it easier for this pumpkin junkie to get her fix.

After discovering the first pumpkin scone of the season last week, I declared to my husband that all was right with the world.  I also found myself inspired to produce some pumpkin goodness in my own kitchen.  Plus, I wanted to give my son a chance to experience pumpkin without all the additives and preservatives of the store-bought pumpkin treats.

The weather in D.C. turned cool late last week and with the arrival of a crisp, feels-like-fall morning, I set out for the grocery store with my son, Davis.  Both of us had our hoodies on as we embraced the cooler temperatures and you could see he was as excited about the mild weather as I was.  Little did he know, he was about to experience the delights of pumpkin post-nap.  We picked up the ingredients for pumpkin bread and once home, Davis took a nap and Operation Pumpkin Indoctrination commenced in the kitchen.

The batter took about 15 minutes to put together while the oven preheated to 350 degrees.  I used fresh ginger this time, but you could easily use the powdered form found in the spice aisle.

Since the recipe made six mini-loafs and I had four pans, I used my mini-muffin/cupcake pan (as featured in my cupcake recipe from last month) to create some pumpkin mini-muffins that were perfect for a snack or for a special and easy to manage treat for Davis and his small hands.

If you have children at home or you simply can’t polish off a whole loaf of pumpkin bread before it has that not so fresh taste, I highly recommend purchasing a set of small loaf pans.  Not only are these perfect for a quick snack for a small family but I find that bread cooks more evenly in the smaller loaf pan.  Less chance for the middle of the bread that just won’t cook as I often encounter when using a standard loaf pan.

While the loaves of pumpkin bread took about 45-50 minutes to cook, the mini-muffins were done in approximately 18-20 minutes.

And, neither disappointed.  I froze a loaf of bread and sent the others to family.  I also froze half of the muffins and kept more out and we snacked on the muffins throughout the weekend.  I placed the muffins to be frozen in an air-tight plastic bag and for the loaves of bread, I took each out of the pan and wrapped it in plastic wrap and then foil before depositing in the freezer.

As the muffins and bread cooked, I took a moment and enjoyed the cool breeze coming in through the windows and the smell of pumpkin and fall filling our home.  To say it was delightful, is an understatement.

Upon waking from his nap, Davis’ pumpkin indoctrination began.  He grabbed a muffin from me, took a small bite and then proceeded to shove the rest in his mouth as he pointed toward the plate with the remaining muffins, asking for more.

With that, another pumpkin junkie was born and Operation Pumpkin Indoctrination was declared a success.

Mission accomplished.

Perfect pumpkin bread and pumpkin mini-muffins

Ingredients
Nonstick vegetable oil spray
3 1/2 cups unbleached all purpose flour
2 teaspoons baking powder
2 teaspoons baking soda
1 1/2 teaspoons salt
1 1/2 teaspoons ground cinnamon
3/4 teaspoon ground nutmeg
3 cups canned pure pumpkin (about 24 ounces)
1 cup sugar
1 cup (packed) golden brown sugar
1 cup vegetable oil
4 large eggs
1 teaspoon minced peeled fresh ginger or the powdered ginger found in the spice aisle
3/4 cup buttermilk

Details
*Preheat oven to 350°F.
*Spray mini loaf pans and/or mini-muffin pans with nonstick spray.
*Combine flour, baking powder, baking soda, salt, cinnamon, and nutmeg in medium bowl; whisk to blend.
*Using electric mixer, beat pure pumpkin and both sugars in large bowl until blended. Gradually beat in oil, then eggs 1 at a time, then minced ginger. Stir in dry ingredients and buttermilk, alternating between each.
*Pour batter into loaf pans or use a small scoop to deposit batter in mini-muffin pan.

Baking time
*Baking time for bread will be 45 minutes to 1 hour or until a toothpick inserted in the middle of the bread comes out clean.
*Baking time for mini-muffins will be 18-20 minutes.

*Recipe adapted from Bon Apetit 2001, Miniature Pumpkin Breads