Blogger's note: This blog post is the first in a series of recipes that I think will be part of my family of three's food traditions.
One of the many things I have enjoyed about being married and now being a mom is creating food traditions for my family of three.
By food tradition, I mean the favorite dish you ate growing up that your mom or dad made and no one else could make it quite the same. Didn't it make you feel special when they made it for you?
I have come to realize that not only is it special when you are on the receiving end of the food but it is incredibly fulfilling when you are on the delivering end as well.
This post is the first in a series of recipes I will be posting on the blog that I have found are a home run for my family. I imagine these recipes will be staples in my cooking repertoire over the hopefully many years ahead that I have to cook for my family.
As my toddler becomes more willing to expand his food horizons, cooking is becoming more fun than ever.
My son recently discovered raisins. And, he is obsessed. Add to that an oatmeal fixation and I decided that oatmeal raisin cookies were a needed addition to our family recipes. I took a standard oatmeal raisin cookie recipe and tweaked it after two rounds of experimentation in pursuit of the perfect cookie. In the end, what resulted in the best cookie cutting in half the amounts of sugar and brown sugar used, added an extra teaspoon of cinnamon, and added half a teaspoon of cloves. (On a side note, I credit my mother-in-law with the ingenious idea of cutting the sugar which results in cookies that are not flat and end up somewhat healthier as well.)
My husband isn't in love with raisins nor are my niece or nephew who were over visiting recently. In case of an anti-raisin faction in your family, add milk chocolate chips. The cookies are still divine though I might admit the cloves if you are going the chocolate route.
Upon finding the cookies waiting for him when he awoke from his nap, my son quickly ate the cookie and announced "More mommy cookies!"
With that, "Mommy Cookies" were added to the can't-live-without Turrentine family recipe repertoire.
I can't wait to send these as a treat with Davis when he goes to kindergarten, then off to college and eventually to send home a batch with him to share with his own children.
Oatmeal Raisin Cookies (a.k.a. Mommy Cookies)
Ingredients
*2 sticks unsalted butter, room temperature
*1/2 cup dark brown sugar, lightly packed
*1/2 cup granulated sugar
*2 large eggs at room temperature
*2 teaspoons pure vanilla extract
*1 teaspoon baking powder
*2 teaspoons cinnamon
*1/2 teaspoon cloves
*1 teaspoon kosher salt
*3 cups old-fashioned oatmeal
*1 1/2 cup raisins
Details
Preheat oven to 350 degrees.
In the bowl of an electric mixer fitted with a paddle attachment, beat the butter, brown sugar and granulated sugar together on medium-high speed until light and fluffy. With the mixer on low, add the eggs, one at a time, and the vanilla.
Sift the flour, baking powder, cinnamon and salt together into a medium bowl. With the mixer on low, slowly add the dry ingredients to the butter mixture. Add the oats and raisins and mix just until combined.
Using a tablespoon, drop 2-inch mounds of dough onto the baking sheets (line either with parchment or using a silpat mat). Bake for 12 to 15 minutes until lightly browned. Transfer to a baking rack and cool completely.
Recipe adapted from Ina Garten.
Showing posts with label dessert. Show all posts
Sunday, July 3, 2011
Thursday, April 28, 2011
Royal wedding = time to make scones (as if I needed an excuse ...)
I've had scone fever the last few weeks and I blame it on the wedding that is taking place tomorrow.
I know it is cliche but for me, royal wedding = scones.
With just over 8 hours until William and Kate get hitched, it's not to late to make scones to celebrate the latest royal union.
My scone recipe will take you about 10-15 minutes to prepare and then 18-20 minutes to bake. Baked from scratch goodness in under an hour can't be beat! This recipe was one of my first posts on the blog when I started writing last year. But, it is worth revisiting in light of tomorrow's festivities.
I've made three batches of scones in the last two weeks and I've not been disappointed. I've mixed in blueberries for one batch and raspberries for another. Regardless of what fruit you mix in, you can't go wrong with this recipe.
It is a very simple recipe that I tweaked to make work for me. You can certainly add the lemon glaze to drizzle over the scones that I have included in the recipe below. I haven't used it recently but it is a nice touch.
Perfect Scones
Yields 12-14 scones
Ingredients
Scones:
*2 cups all-purpose flour, plus more for dusting
*1/2 cup sugar
*2 teaspoons baking powder
*6 tablespoons unsalted butter, but into fourths
*1/4 teaspoon kosher salt
*1 cup heavy cream
*A little under a pint of the fruit of your choice (I like using blueberries or raspberries)
Glaze:
*1/8 cup lemon juice (preferably fresh)
*1 cup powdered sugar
*1-2 tablespoons of water
Details
For the scones:
Preheat oven to 375 degrees
Line a baking sheet with parchment paper or a silpat
In the bowl of a food processor, blend together the flour, sugar, baking powder, salt and butter until the mixture resembles a coarse meal.
Transfer the mixture to a medium bowl and add in the cream until the mixture forms a dough.
Blend in the fruit to the dough mixture.
On a lightly floured surface, roll out the dough into a 1/2 inch thick, 10-in circle. If dough seems dry, add a splash of heavy cream.
Using a glass that has a 2-3 inch opening, cut out circular pieces of dough and add to the baking sheet.
Bake for 18-20 minutes or until tops start to turn light brown
Once cooled, drizzle with glaze using a spoon
For the glaze:
Mix together the lemon juice and powdered sugar until smooth. Add water until the mixture is thin enough to drizzle. Let the glaze set for at least 15 mins.
Recipe adapted from Giada de Laurentiis
I know it is cliche but for me, royal wedding = scones.
With just over 8 hours until William and Kate get hitched, it's not to late to make scones to celebrate the latest royal union.
My scone recipe will take you about 10-15 minutes to prepare and then 18-20 minutes to bake. Baked from scratch goodness in under an hour can't be beat! This recipe was one of my first posts on the blog when I started writing last year. But, it is worth revisiting in light of tomorrow's festivities.
I've made three batches of scones in the last two weeks and I've not been disappointed. I've mixed in blueberries for one batch and raspberries for another. Regardless of what fruit you mix in, you can't go wrong with this recipe.
It is a very simple recipe that I tweaked to make work for me. You can certainly add the lemon glaze to drizzle over the scones that I have included in the recipe below. I haven't used it recently but it is a nice touch.
Perfect Scones
Yields 12-14 scones
Ingredients
Scones:
*2 cups all-purpose flour, plus more for dusting
*1/2 cup sugar
*2 teaspoons baking powder
*6 tablespoons unsalted butter, but into fourths
*1/4 teaspoon kosher salt
*1 cup heavy cream
*A little under a pint of the fruit of your choice (I like using blueberries or raspberries)
Glaze:
*1/8 cup lemon juice (preferably fresh)
*1 cup powdered sugar
*1-2 tablespoons of water
Details
For the scones:
Preheat oven to 375 degrees
Line a baking sheet with parchment paper or a silpat
In the bowl of a food processor, blend together the flour, sugar, baking powder, salt and butter until the mixture resembles a coarse meal.
Transfer the mixture to a medium bowl and add in the cream until the mixture forms a dough.
Blend in the fruit to the dough mixture.
On a lightly floured surface, roll out the dough into a 1/2 inch thick, 10-in circle. If dough seems dry, add a splash of heavy cream.
Using a glass that has a 2-3 inch opening, cut out circular pieces of dough and add to the baking sheet.
Bake for 18-20 minutes or until tops start to turn light brown
Once cooled, drizzle with glaze using a spoon
For the glaze:
Mix together the lemon juice and powdered sugar until smooth. Add water until the mixture is thin enough to drizzle. Let the glaze set for at least 15 mins.
Recipe adapted from Giada de Laurentiis
Thursday, April 7, 2011
A suitable substitute for Elephant Tracks
My dad had a little bit of a sweet tooth. I think that may be the understatement of the century.
In particular, dad loved ice cream. His all-time favorite happened to be a flavor called Elephant Tracks made by a local ice cream purveyor, Cedar Crest. Elephant Tracks featured chocolate ice cream with peanut butter cups. Divine, right? Who doesn’t love chocolate and peanut butter? The combination no matter how you prepare it is one of my favorites to this day.
I am not sure how many half-gallons of Elephant Tracks dad ate in a month, but it was a lot. He was obsessed.
One day, I went with dad to the local Piggly Wiggly (The Pig) grocery store to pick-up a half-gallon of Elephant Tracks. But it was nowhere to be found.
Yikes. Dad was not pleased. But he didn’t end his pursuit at the The Pig. He was on a mission. A man hunting for his prey, Elephant Tracks.
We went to the Pick ‘n Save in Saukville. No luck. The Sentry grocery store in Port Washington. No dice. Back to Saukville to the Tri-Par gas station and convenience store. Still no Elephant Tracks.
His prey was proving elusive. And this was not cool.
Dad was flustered, his face getting redder by the minute as we drove around in pursuit of the ice cream. Where in the world was his beloved Elephant Tracks? Dad had a bit of a temper and was definitely peeved that the Ice Cream Gods were clearly conspiring against him to keep him from his flavor of choice. We were out of ideas and heading home until suddenly Dad said, “We are going straight to the source! Let’s go to the Cedar Crest distribution center.”
Off we went to Cedarburg. And he was speeding. We pulled into the parking lot and Dad jumped out of the car probably faster than I had ever seen him move. We went in and quickly scanned the cases holding the ice cream. Eureka! We found two half-gallons of Elephant Tracks. Dad’s face lit up! Mission accomplished. We went to pay for the ice cream and dad described the odyssey we had been on for Elephant Tracks and how relieved he was to have found his ice cream.
But the bliss didn’t last long. The cashier told Dad that the Elephant Tracks flavor was being discontinued.
The utter despair that crossed Dad’s face is unforgettable. We walked out of the store, still happy to have the last two half-gallons of Elephant Tracks in existence but knowing he would have to find other ways to get his peanut butter and chocolate combination fix.
I had completely forgotten this story until last month when I found myself with a craving for chocolate and peanut butter. If Dad were still with us, I know he would have thought this dessert was a homerun and a solid replacement for Elephant Tracks.
With Dad in mind, I created a no bake peanut butter and chocolate cookie pie with a graham cracker crust. It was sinful and easy. I could have eaten the filling by the spoonful. Well, I actually may have done just that with the leftover filling. Okay, okay, I did eat about five leftover spoonfulls. And it was glorious!
No Bake Peanut Butter Chocolate Cookie Pie
(Makes one 9-inch pie and serves 6-8 people depending on how big you cut the slices)
**Please note that instead of making the crust from scratch, you can also use a store-bought graham cracker crust. Also, I used Newman’s brand chocolate cream cookies but you can use Oreos instead.
Ingredients
Graham Cracker Crust
*1 and 2/3 cups graham cracker crumbs
*1/4 cup sugar
*1/4 cup plus 2 tablespoons butter, melted
No Bake Peanut Butter Chocolate Cookie Pie Filling and Topping
*1 (8 ounce) package cream cheese
*1 ½ cups confectioners’ sugar
*1 cup creamy peanut butter (I like Jif)
*1 cup milk
*1 cup heavy whipping cream
*1 teaspoon vanilla
*10 chocolate cream cookies (either Newman’s Chocolate Cream Cookies or Oreos)
*Optional: melt some chocolate chips and use to drizzle over pie
Details
For Graham Cracker Crust:
Using a food processor, crush enough graham crackers to yield 1 2/3 cups crumbs. Alternately, you can put the graham crackers in a bag and crush them with a rolling pan.
Melt butter and then in a bowl, combine sugar, butter and graham cracker crumbs until well-blended.
Transfer mixture to 9-inch pie pan and press crumb mixture into bottom and sides until evenly distributed. Set aside.
For No Bake Peanut Butter Chocolate Cookie Pie Filling and Topping:
Using VERY soft cream cheese, beat together cream cheese and confectioners’ sugar in a standing mixer or with a hand mixer.
Once cream cheese and confectioners’ sugar is well beaten and almost fluffy, mix in peanut butter and milk. Beat until smooth. Transfer to a bowl.
In the bowl of the standing mixer, pour in heavy whipping cream and vanilla and beat until peaks form and mixture is fluffy.
Transfer whipped cream mixture to the cream cheese and peanut butter mixture and gently fold in the whipped cream. Once combined, transfer mixture to the pie crust and spread evenly in the crust.
In a food processor, 4 of the chocolate cream cookies until they are crumbs. Alternately, you can put the cookies in a Ziploc bag and crush with a rolling pin.
Take the cookie crumbs and sprinkle over the top of the pie. Place the six whole cookies in the pie (see picture above). It makes the pie look pretty but you can easily skip this step.
If you need a little more chocolate, melt a handful of chocolate chips and then using a spoon, drizzle the melted chococolate over the pie.
Cover pie with plastic wrap and place in freezer for at least two hours or as long as you can stand to wait for this delicious pie.
Adapted from AllRecipes and Cooks.com
In particular, dad loved ice cream. His all-time favorite happened to be a flavor called Elephant Tracks made by a local ice cream purveyor, Cedar Crest. Elephant Tracks featured chocolate ice cream with peanut butter cups. Divine, right? Who doesn’t love chocolate and peanut butter? The combination no matter how you prepare it is one of my favorites to this day.
I am not sure how many half-gallons of Elephant Tracks dad ate in a month, but it was a lot. He was obsessed.
One day, I went with dad to the local Piggly Wiggly (The Pig) grocery store to pick-up a half-gallon of Elephant Tracks. But it was nowhere to be found.
Yikes. Dad was not pleased. But he didn’t end his pursuit at the The Pig. He was on a mission. A man hunting for his prey, Elephant Tracks.
We went to the Pick ‘n Save in Saukville. No luck. The Sentry grocery store in Port Washington. No dice. Back to Saukville to the Tri-Par gas station and convenience store. Still no Elephant Tracks.
His prey was proving elusive. And this was not cool.
Dad was flustered, his face getting redder by the minute as we drove around in pursuit of the ice cream. Where in the world was his beloved Elephant Tracks? Dad had a bit of a temper and was definitely peeved that the Ice Cream Gods were clearly conspiring against him to keep him from his flavor of choice. We were out of ideas and heading home until suddenly Dad said, “We are going straight to the source! Let’s go to the Cedar Crest distribution center.”
Off we went to Cedarburg. And he was speeding. We pulled into the parking lot and Dad jumped out of the car probably faster than I had ever seen him move. We went in and quickly scanned the cases holding the ice cream. Eureka! We found two half-gallons of Elephant Tracks. Dad’s face lit up! Mission accomplished. We went to pay for the ice cream and dad described the odyssey we had been on for Elephant Tracks and how relieved he was to have found his ice cream.
But the bliss didn’t last long. The cashier told Dad that the Elephant Tracks flavor was being discontinued.
The utter despair that crossed Dad’s face is unforgettable. We walked out of the store, still happy to have the last two half-gallons of Elephant Tracks in existence but knowing he would have to find other ways to get his peanut butter and chocolate combination fix.
I had completely forgotten this story until last month when I found myself with a craving for chocolate and peanut butter. If Dad were still with us, I know he would have thought this dessert was a homerun and a solid replacement for Elephant Tracks.
With Dad in mind, I created a no bake peanut butter and chocolate cookie pie with a graham cracker crust. It was sinful and easy. I could have eaten the filling by the spoonful. Well, I actually may have done just that with the leftover filling. Okay, okay, I did eat about five leftover spoonfulls. And it was glorious!
No Bake Peanut Butter Chocolate Cookie Pie
(Makes one 9-inch pie and serves 6-8 people depending on how big you cut the slices)
**Please note that instead of making the crust from scratch, you can also use a store-bought graham cracker crust. Also, I used Newman’s brand chocolate cream cookies but you can use Oreos instead.
Ingredients
Graham Cracker Crust
*1 and 2/3 cups graham cracker crumbs
*1/4 cup sugar
*1/4 cup plus 2 tablespoons butter, melted
No Bake Peanut Butter Chocolate Cookie Pie Filling and Topping
*1 (8 ounce) package cream cheese
*1 ½ cups confectioners’ sugar
*1 cup creamy peanut butter (I like Jif)
*1 cup milk
*1 cup heavy whipping cream
*1 teaspoon vanilla
*10 chocolate cream cookies (either Newman’s Chocolate Cream Cookies or Oreos)
*Optional: melt some chocolate chips and use to drizzle over pie
Details
For Graham Cracker Crust:
Using a food processor, crush enough graham crackers to yield 1 2/3 cups crumbs. Alternately, you can put the graham crackers in a bag and crush them with a rolling pan.
Melt butter and then in a bowl, combine sugar, butter and graham cracker crumbs until well-blended.
Transfer mixture to 9-inch pie pan and press crumb mixture into bottom and sides until evenly distributed. Set aside.
For No Bake Peanut Butter Chocolate Cookie Pie Filling and Topping:
Using VERY soft cream cheese, beat together cream cheese and confectioners’ sugar in a standing mixer or with a hand mixer.
Once cream cheese and confectioners’ sugar is well beaten and almost fluffy, mix in peanut butter and milk. Beat until smooth. Transfer to a bowl.
In the bowl of the standing mixer, pour in heavy whipping cream and vanilla and beat until peaks form and mixture is fluffy.
Transfer whipped cream mixture to the cream cheese and peanut butter mixture and gently fold in the whipped cream. Once combined, transfer mixture to the pie crust and spread evenly in the crust.
In a food processor, 4 of the chocolate cream cookies until they are crumbs. Alternately, you can put the cookies in a Ziploc bag and crush with a rolling pin.
Take the cookie crumbs and sprinkle over the top of the pie. Place the six whole cookies in the pie (see picture above). It makes the pie look pretty but you can easily skip this step.
If you need a little more chocolate, melt a handful of chocolate chips and then using a spoon, drizzle the melted chococolate over the pie.
Cover pie with plastic wrap and place in freezer for at least two hours or as long as you can stand to wait for this delicious pie.
Adapted from AllRecipes and Cooks.com
Wednesday, January 19, 2011
Not all crostatas are created equal
It's been a while.
Christmas. New Year. Food Poisoning. Starting a business.
And OOOOOH Honey.
If the holidays don't wear you out from cooking, the last two items in the last sentence will force you to take a break from getting crazy in the kitchen. To clarify, the food poisoning was not the result of my cooking or for that matter, that of friends or family. The blame fell to the deli turkey from a local grocery store. And alas, while the new business is not food-related, it is keeping me mighty busy and feeling challenged again in my professional life.
But now I am back!
I did a decent amount of cooking over Christmas though nothing like the Thanksgiving extravaganza. My cooking exploits had mixed results. I tried making cinnamon rolls for the first time and found out just how temperamental yeast can be. Apparently, my beloved kitchen may not be the right incubator for yeast to do what it should do: rise! After two rounds of making dough, including once at 10 pm on Christmas Eve, I realized I had killed my yeast. I forged on and still made the rolls the next morning. They turned out like little flat hockey pucks. But let me tell you, ain't nothing that a pound of butter and cinnamon can't make better! Flat or not, they were delish. Anyway, when I can figure out how to get the dough to rise, I'll post the recipe.
In the meantime, I also learned that not all crostatas are created equal. In the fall, I made a divine pear and fig crostata. I mean, this dessert made my toes curl it was so good. And it was so easy to make. Easy crust with no dough drama. Delicious filling with the slightly exotic flavor of cardamom.
So why did I not make this again for Christmas? Good question.
I decided to use a different crostata recipe for my Christmas dessert. It was an apple crostata and unfortunately, it was a mess. It turned out okay once it was baked but it was a rocky road to making it look nice. The dough was next to impossible to work with. It was like a triage station in the kitchen on Christmas day as I tried to patch the dough of the crostata together to hold the filling in. The finished product was ... well, fine. But not the rock star quality of the crostata from the fall.
Try this absolutely divine pear and fig crostata. I don't know if it is the cardamom or the way the crust gets golden brown because you brush it with heavy cream but everything about this dessert was perfect. It is the ideal dessert to serve for a dinner party on a cold winter night.
Pear and Fig Crostata
Recipe courtesy of Bon Appetit
Christmas. New Year. Food Poisoning. Starting a business.
And OOOOOH Honey.
If the holidays don't wear you out from cooking, the last two items in the last sentence will force you to take a break from getting crazy in the kitchen. To clarify, the food poisoning was not the result of my cooking or for that matter, that of friends or family. The blame fell to the deli turkey from a local grocery store. And alas, while the new business is not food-related, it is keeping me mighty busy and feeling challenged again in my professional life.
But now I am back!
I did a decent amount of cooking over Christmas though nothing like the Thanksgiving extravaganza. My cooking exploits had mixed results. I tried making cinnamon rolls for the first time and found out just how temperamental yeast can be. Apparently, my beloved kitchen may not be the right incubator for yeast to do what it should do: rise! After two rounds of making dough, including once at 10 pm on Christmas Eve, I realized I had killed my yeast. I forged on and still made the rolls the next morning. They turned out like little flat hockey pucks. But let me tell you, ain't nothing that a pound of butter and cinnamon can't make better! Flat or not, they were delish. Anyway, when I can figure out how to get the dough to rise, I'll post the recipe.
In the meantime, I also learned that not all crostatas are created equal. In the fall, I made a divine pear and fig crostata. I mean, this dessert made my toes curl it was so good. And it was so easy to make. Easy crust with no dough drama. Delicious filling with the slightly exotic flavor of cardamom.
So why did I not make this again for Christmas? Good question.
I decided to use a different crostata recipe for my Christmas dessert. It was an apple crostata and unfortunately, it was a mess. It turned out okay once it was baked but it was a rocky road to making it look nice. The dough was next to impossible to work with. It was like a triage station in the kitchen on Christmas day as I tried to patch the dough of the crostata together to hold the filling in. The finished product was ... well, fine. But not the rock star quality of the crostata from the fall.
Try this absolutely divine pear and fig crostata. I don't know if it is the cardamom or the way the crust gets golden brown because you brush it with heavy cream but everything about this dessert was perfect. It is the ideal dessert to serve for a dinner party on a cold winter night.
Pear and Fig Crostata
![]() |
| The finished product in all it's golden brown, bubbly filling goodness glory! |
Ingredients
Crust
1 2/3 cups unbleached all purpose flour
1/3 cup cornmeal
2 tablespoons sugar
1 teaspoon salt
3/4 cup (1 1/2 sticks) chilled unsalted butter, cut into 1/2-inch cubes
3 tablespoons (or more) ice water
Filling
1/4 cup (packed) golden brown sugar
1/4 cup sugar
2 tablespoons cornstarch
1 teaspoon (scant) ground cardamom
1/4 teaspoon ground cloves
1/4 teaspoon coarse kosher salt
2 1/4 pounds firm but ripe unpeeled Anjou pears (about 4), cored, each cut into 8 wedges
10 dried but moist Calimyrna figs (about 4 ounces), stemmed, quartered
Heavy whipping cream (for brushing)
Raw sugar
2 tablespoons honey
Details
For the crust:
Blend first 4 ingredients in processor. Add butter; using on/off turns, process until mixture resembles coarse meal. Remove lid; spoon 3 tablespoons ice water over mixture. Return lid to processor; using on/off turns, blend mixture until dough forms ball, adding more ice water by teaspoonfuls if dry. Flatten dough into disk; wrap in plastic and chill at least 20 minutes.
For the filling:
Position rack in center of oven; preheat to 400°F. Whisk first 6 ingredients in large bowl. Add pears and figs; toss gently. Roll dough out on lightly floured parchment to 14-inch square or round.

The fig and pear mixture in the rolled-out crostata crust. Transfer parchment with rolled-out crust to a baking sheet. Mound pear mixture with juices in center of crust, leaving 2- to 3-inch plain dough border. Using parchment as aid, fold dough up over edges of pear mixture, pleating edges and pinching to seal any cracks in dough, forming square or round. Brush crust edges with cream; sprinkle generously with raw sugar.
The crostata pre-baking with the sides pulled up around the filling and the outside brushed with heavy cream and sprinkled with raw sugar. Bake crostata until crust is golden, pears are tender, and juices are bubbling thickly, covering crust edges with foil if browning too quickly, 50 to 60 minutes.
Remove crostata from oven; drizzle 2 tablespoons honey over hot filling. Run long thin knife or spatula around edges of warm crostata to loosen. Cool crostata on parchment on baking sheet until slightly warm, at least 1 hour. Transfer to platter. Serve slightly warm or at room temperature.
Recipe courtesy of Bon Appetit
Saturday, December 11, 2010
Self-destruction by peanut butter?
I've become a peanut butter junkie in the past few years. And like any good junkie, I make excuses for my addiction.
Such as:
It's good protein.
Just one spoonful can't hurt me.
But like the junkies I see on A&E's "Intervention," it rarely stops at "just one" or "just a little."
When I was single, I routinely came home after work and had a spoonful of peanut butter out of the jar while my dinner cooked. One spoonful would turn into a peanut butter orgy parked in front of the TV watching reruns of "Law and Order" while a plate of chicken and vegetables congealed on the counter, pushed aside.
Thank goodness I met my husband and saved myself from self-destruction by peanut butter, right?
I've been making homemade granola quite a bit lately and noticed a recipe on the back of the canister for oatmeal cookies. Yum. Except they had raisins which didn't excite me.
What can make healthy oats naughty?
Peanut butter and two sticks of butter!
With my son down for his nap, I practically ran to the kitchen to start baking. I mixed the dry ingredients (flour, oats, baking powder, coarse salt, baking soda) and then powered-up the mixer to whip together the butter, peanut butter, sugar and brown sugar. Once those where combined and smooth, I added in eggs and vanilla.
Let me tell you, two sticks of butter, sugars and vanilla make quick-cooking oats much more exciting!
I added in the dry ingredients to the butter/sugar/egg mixture and mixed briefly until just combined.
And then, I couldn't help it. I took a big spoonful of the dough and devoured it pushing aside thoughts of how salmonella could be lurking in the raw eggs that were in the dough I was shoveling in my mouth.
Now that's living on the edge, people.
The finished product is just as delightful as the raw dough. The cookies are quite thin but become a little crisp around the edges and mushy in the middle. I have no idea how they will taste tomorrow but these are a "live in the moment" cookie, I think. (I will report back how they hold-up on Day 2.)
I fully realize I should be posting about holiday cookies and that will come very soon but today, I just needed my peanut butter fix.
It seems, this junkie's old habits are dying hard. Thank goodness.
Oatmeal Peanut Butter Cookies
Ingredients
3 cups old-fashioned rolled oats
Such as:
It's good protein.
Just one spoonful can't hurt me.
But like the junkies I see on A&E's "Intervention," it rarely stops at "just one" or "just a little."
When I was single, I routinely came home after work and had a spoonful of peanut butter out of the jar while my dinner cooked. One spoonful would turn into a peanut butter orgy parked in front of the TV watching reruns of "Law and Order" while a plate of chicken and vegetables congealed on the counter, pushed aside.
Thank goodness I met my husband and saved myself from self-destruction by peanut butter, right?
I've been making homemade granola quite a bit lately and noticed a recipe on the back of the canister for oatmeal cookies. Yum. Except they had raisins which didn't excite me.
What can make healthy oats naughty?
Peanut butter and two sticks of butter!
With my son down for his nap, I practically ran to the kitchen to start baking. I mixed the dry ingredients (flour, oats, baking powder, coarse salt, baking soda) and then powered-up the mixer to whip together the butter, peanut butter, sugar and brown sugar. Once those where combined and smooth, I added in eggs and vanilla.
Let me tell you, two sticks of butter, sugars and vanilla make quick-cooking oats much more exciting!
I added in the dry ingredients to the butter/sugar/egg mixture and mixed briefly until just combined.
And then, I couldn't help it. I took a big spoonful of the dough and devoured it pushing aside thoughts of how salmonella could be lurking in the raw eggs that were in the dough I was shoveling in my mouth.
Now that's living on the edge, people.
The finished product is just as delightful as the raw dough. The cookies are quite thin but become a little crisp around the edges and mushy in the middle. I have no idea how they will taste tomorrow but these are a "live in the moment" cookie, I think. (I will report back how they hold-up on Day 2.)
I fully realize I should be posting about holiday cookies and that will come very soon but today, I just needed my peanut butter fix.
It seems, this junkie's old habits are dying hard. Thank goodness.
Oatmeal Peanut Butter Cookies
Ingredients
3 cups old-fashioned rolled oats
- 1/3 cup flour
- 1 teaspoon baking soda
- 1 teaspoon baking powder
- 1/2 teaspoon coarse salt
- 1 cup packed light-brown sugar
- 1 cup granulated sugar
- 2 sticks unsalted butter, softened
- 1/2 cup peanut butter
- 2 large eggs
- 1 teaspoon pure vanilla extract
Details
Preheat oven to 350 degrees.
In a medium bowl, mix the oats, flour, baking soda, baking powder and salt. Set aside.
In the bowl of a mixer, add butter, peanut butter, brown sugar and granulated sugar. Mix until smooth.
Add eggs and vanilla to the butter mixture and mix until well combined.
Add dry oat mixture to the butter/egg mixture and mix until just combined.
Using a small cookie dough scoop, place dough on ungreased cookie sheet (I recommend using a silpat mat).
Bake for 13-15 minutes.
Recipe adapted from Martha Stewart Living
Thursday, October 28, 2010
On sympathy carbo-loading (a.k.a. gratuitous carb consumption)
For many years, the arrival of fall meant the anticipation of race day for whatever marathon I was running that year and, most importantly, carbo-loading. For several years, I was one of those crazy people who thought running 26.2 miles for fun was enjoyable.
Turns out, my hip flexors didn’t find the same enjoyment. After my eighth race, I have hung up my sneakers for a bit. A couple weekends ago, with the Marine Corps marathon approaching in my city, I was having marathon envy. Other than the high of crossing the finish line intact and knowing a humongous diet coke and Swedish fish were awaiting me, the best part of the lead-up to marathon day for me was always carbo-loading.
Carbo-what you ask?
That’s right, for one week every year I would eat as many carbs as I wanted to help fuel my system through the upcoming race. Now, complex carbs are recommended but damn, if I was running a marathon, I was having whatever carbs I wanted as a reward.
There were a lot of moving parts involved in running marathons and my mom and dad were there every step of the way. Including, for the eating leading up to the race. They were loyal spectators –okay, groupies-- at all my races. And being a groupie ain’t all it’s cracked up to be, even if it’s for your own child.
Being part of my marathon posse meant schlepping with me to the starting line of my first race in Chicago on a very cold and blustery morning and traipsing all over the city in the cold to see me at various mile markers. It also meant getting up at 3:30 am with me to catch the bus to the starting line of the Disney Marathon on a chilly January morning in Orlando. Not sure that was the “Happiest Place on Earth” that morning.
But my parents did it with a smile. And signs. Lots of signs that said “Run, Little Flower, Run.” My dad was not shy about advertising my nickname.
Being my marathon groupies also meant that my parents joined me for the massive carbo-loading dinners on the eve of race day. As you may have gathered, my dad loved nothing more than to eat. Gosh, he would have been a good marathoner because he could carbo-load with the best of ‘em.
It was at the carbo-loading dinner before the Disney Marathon in 2001 that my dad coined a term non-marathoners and anti-Dr. Atkins folks all over the world should embrace and adopt.
After two huge bowls of pasta from a huge buffet of every kind of pasta and sauce imaginable and a huge pile of bread, I put my fork down and said UNCLE. Same for my mom. My dad sat at the table looking a bit full but not quite and with a twinkle in his eye asked me if he thought it was okay for him to keep eating even if the marathoner had stopped. Before I could answer he said, “Oh what the hell, I am sympathy carbo-loading for you, Little Flower! I’m going back for another round.”
Sympathy carbo-loading!? Right on, Dad!
My mom and I couldn’t stop laughing as my dad lurched toward the buffet and proudly told everyone that he was “sympathy carbo-loading because did you know my Little Flower is running the race tomorrow?”
Earlier this month with marathons on the brain, I decided to sympathy carbo-load as well for all my friends running races this month. Well, um, actually, I don’t really know anyone running. To be honest I really just needed some gratuitous carbs. BAD. And that’s why I made pumpkin biscotti with a cinnamon glaze.
The biscotti are incredibly easy to make. Simply combine the dry ingredients in one bowl, the wet ingredients in another and then combine the wet to the dry. I suggest dusting your hands with flour before combining the two as the dough will get sticky as you mix it together using your hands. The flour will keep most of the dough from sticking to your hands.
On a baking sheet and with the oven heated to 350 degrees, I arranged the dough in two loaves on a silpat mat.
After baking the biscotti for 30 to 40 minutes Bake for 30-40, I removed the biscotti from the oven and cooled until just slightly warm. Using a serrated knife (I recommend this one), I cut the biscotti into 1 inch wide pieces and laid each piece flat on the silpat mat. Then, I turned the oven down to 300 degrees and baked the biscotti for an additional 15-20 minutes. This will ensure they start to harden a bit to give you that nice crunch that really good biscotti have.
While the biscotti were cooling, I mixed up the cinnamon glaze which is very simple to do. Once the biscotti cooled, I dipped a spoon in the glaze and drizzled it over the biscotti.
I pulled Davis in to the sympathy carbo-loading once he woke up from his nap. It’s never too early to start training.
Turns out, my hip flexors didn’t find the same enjoyment. After my eighth race, I have hung up my sneakers for a bit. A couple weekends ago, with the Marine Corps marathon approaching in my city, I was having marathon envy. Other than the high of crossing the finish line intact and knowing a humongous diet coke and Swedish fish were awaiting me, the best part of the lead-up to marathon day for me was always carbo-loading.
Carbo-what you ask?
That’s right, for one week every year I would eat as many carbs as I wanted to help fuel my system through the upcoming race. Now, complex carbs are recommended but damn, if I was running a marathon, I was having whatever carbs I wanted as a reward.
There were a lot of moving parts involved in running marathons and my mom and dad were there every step of the way. Including, for the eating leading up to the race. They were loyal spectators –okay, groupies-- at all my races. And being a groupie ain’t all it’s cracked up to be, even if it’s for your own child.
Being part of my marathon posse meant schlepping with me to the starting line of my first race in Chicago on a very cold and blustery morning and traipsing all over the city in the cold to see me at various mile markers. It also meant getting up at 3:30 am with me to catch the bus to the starting line of the Disney Marathon on a chilly January morning in Orlando. Not sure that was the “Happiest Place on Earth” that morning.
![]() |
| Bleary-eyed with my dad at the Disney Marathon before heading to the starting line. |
Being my marathon groupies also meant that my parents joined me for the massive carbo-loading dinners on the eve of race day. As you may have gathered, my dad loved nothing more than to eat. Gosh, he would have been a good marathoner because he could carbo-load with the best of ‘em.
It was at the carbo-loading dinner before the Disney Marathon in 2001 that my dad coined a term non-marathoners and anti-Dr. Atkins folks all over the world should embrace and adopt.
After two huge bowls of pasta from a huge buffet of every kind of pasta and sauce imaginable and a huge pile of bread, I put my fork down and said UNCLE. Same for my mom. My dad sat at the table looking a bit full but not quite and with a twinkle in his eye asked me if he thought it was okay for him to keep eating even if the marathoner had stopped. Before I could answer he said, “Oh what the hell, I am sympathy carbo-loading for you, Little Flower! I’m going back for another round.”
Sympathy carbo-loading!? Right on, Dad!
My mom and I couldn’t stop laughing as my dad lurched toward the buffet and proudly told everyone that he was “sympathy carbo-loading because did you know my Little Flower is running the race tomorrow?”
Earlier this month with marathons on the brain, I decided to sympathy carbo-load as well for all my friends running races this month. Well, um, actually, I don’t really know anyone running. To be honest I really just needed some gratuitous carbs. BAD. And that’s why I made pumpkin biscotti with a cinnamon glaze.
The biscotti are incredibly easy to make. Simply combine the dry ingredients in one bowl, the wet ingredients in another and then combine the wet to the dry. I suggest dusting your hands with flour before combining the two as the dough will get sticky as you mix it together using your hands. The flour will keep most of the dough from sticking to your hands.
On a baking sheet and with the oven heated to 350 degrees, I arranged the dough in two loaves on a silpat mat.
After baking the biscotti for 30 to 40 minutes Bake for 30-40, I removed the biscotti from the oven and cooled until just slightly warm. Using a serrated knife (I recommend this one), I cut the biscotti into 1 inch wide pieces and laid each piece flat on the silpat mat. Then, I turned the oven down to 300 degrees and baked the biscotti for an additional 15-20 minutes. This will ensure they start to harden a bit to give you that nice crunch that really good biscotti have.
While the biscotti were cooling, I mixed up the cinnamon glaze which is very simple to do. Once the biscotti cooled, I dipped a spoon in the glaze and drizzled it over the biscotti.
![]() |
| The finished product |
Pumpkin Biscotti with Cinnamon Glaze
(Makes 25-30 biscotti)
Ingredients
For the biscotti:
2 1/2 cups flour
1 cup sugar
1 teaspoon baking powder
1 teaspoon cinnamon
1/2 teaspoon nutmet
Pingch of ginger
Pinch of cloves
Pinch of salt
2 eggs
1/2 cup pumpkin puree
1 teaspoon vanilla extract
For the glaze:
1/2 cup confectioners' sugar
1 tablespoon milk
1/2 teaspoon cinnamon
Details
Preheat oven to 350 degrees. Sift together flour, salt, sugar, baking powder and spices in medium bowl.
In another bowl, whisk eggs, pumpkin, and vanilla extract. Pour the pumpkin mixture into the flour mixture. Lightly dust your hands with flour and use your hands to incorporate the ingredients or use a medium spatula. Dough will be crumbly once it is ready to be baked. Knead dough gently in the bowl.
Deposit dough on silpat-lined baking sheet (or use parchment paper if you don't have a silpat mat. Form the dough into two loaves. They should be fairly flat and about 1/2 inch high. Bake for 30-40 minutes or until center is firm to the touch.
Remove from oven and let biscotti cool. Once cool enough that you can touch, using a serrated knife, cut into 1 inch wide pieces and lay flat on the baking sheet. Turn the oven down to 300 degrees and bake for an additional 15-20 minutes. Cool completely.
While biscotti are cooling, mix powdered sugar, milk and cinnamon in a small bowl with a whisk or fork. Mix until smooth. Dip a spoon in the glaze and drizzle glaze over biscotti.
Recipe adapted from Simply Recipes
Tuesday, October 5, 2010
Will you still need me, will you still feed me
Dear Dad,
Today I was listening to the Beatles song, “When I’m 64” and thought of you, even though today you would have turned 65!
As you know being the Beatles fan that you were, the refrain to the song goes, “Will you still need me, will you still feed me, when I’m 64.”
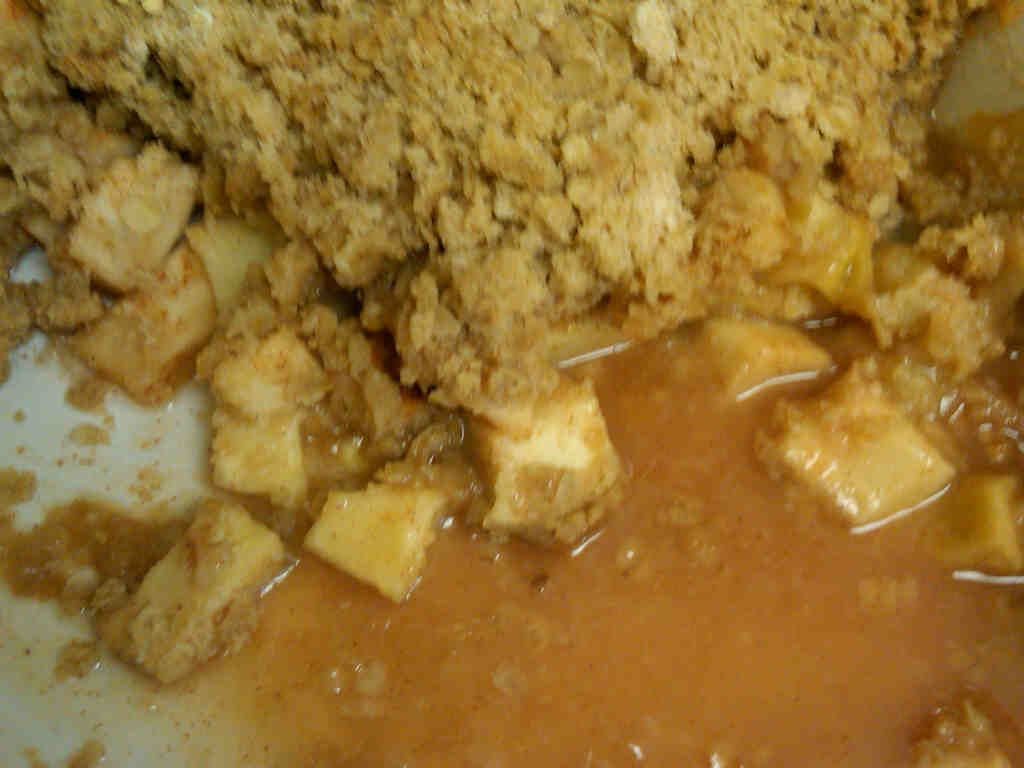
And, even though you’re 65, I like to think I am still feeding you vicariously every day. You inspire my cooking and were the inspiration for me to begin this blog. Whether it is the apple crumble I made a few weeks ago (recipe is below if you want to make it for your friends up there or the Big Guy … if he could turn water into wine, who knows what he could do with this crumble), your orzo salad or trying something new like Indian Chicken. You are with my every time I enter the kitchen.
You’ve also made me realize the importance of including my son and your grandson, Davis, in the cooking process. He loves to be in the kitchen to see what is going on. He has now mangled my whisk which has become his beloved kitchen tool of choice. You would be so proud of the way he manhandled his tortellini last weekend. Here's a picture of the aftermath:
As I have on your birthday since you passed away way too soon almost six years ago, I went out to lunch with Dan to celebrate what would have been your 65th year. I know, I know. I am sure you did think I was really just looking for an excuse to eat an insanely delicious, gluttonous lunch. That’s only partly true.
Today we celebrated your life by eating a few of your favorite things that you taught me to enjoy and toasting to you. I had a divine pizza with provolone cheese and homemade soppresata. You would have loved it. Salty and authentic perfection. I can still remember when you introduced me to soppresata for the first time at 9 years old at Glorioso’s, a small Italian grocery store in Milwaukee. I could hardly pronounce the word but oooooooooh did I love that piece of Italian goodness that the lady behind the deli counter sliced for me. I remember that you said to me, “See Little Flower, you try something new and you might like it. I would never lead you astray when it comes to food.” As usual, you were right.
You showed me how to live life to the fullest, particularly when it came to food -- both eating and consuming it.
To enjoy every meal like it was your last.
To worry about watching your weight another day but definitely not on the day when you had the chance to eat something amazing or try a new dish for the first time.
To understand how feeding people brings a group together.
As for the other part of the Beatles song (‘Will you still need me?’), the answer is Y-E-S.
Even at 31 years old, I need my dad. Thanks to your gentle nudging from above, I have found that the way to stay connected to you is through cooking. And it has brought me more comfort and enjoyment than you will ever know. Thank you for pointing me in the right direction and I will keep ‘feeding you’ from down here.
Xoxo
Little Flower (a.k.a. your daughter, Colleen)
Dad's Birthday Apple Crumbly
(Serves 6 to 8)
Filling
5 Granny Smith Apples, peeled, cored and cut into 1-inch pieces
1/2 cup granulated sugar
1 teaspoon vanilla extract
1 1/2 teaspoons ground cinnamon
1/2 teaspoon ground nutmeg
1/4 teaspoon kosher salt
2 teaspoons fresh lemon juice
Crumble topping
1 stick unsalted butter
1 cup light brown sugar
1/4 teaspoon kosher salt
1 cup all-purpose flour
1/3 cup rolled oats or quick cooking oats
Details
*Preheat the oven to 350 degrees.
*To make the filling, combine the apples, granulated sugar, lemon juice, vanilla, cinnamon, nutmet and kosher salt in a baking dish and mix well.
*To make the streusel topping, melt the butter.
*Remove the butter from heat and stir in the brown sugar and kosher salt. Add the flour and oatmeal and stir until incorporated.
*Crumble the mixture over the apple filling. Place the baking dish on a baking sheet and bake until the topping is golden brown and the filling is bubbling for 50 to 60 minutes.
**Weekend Gourmet's note: You can make the filling 6 to 8 hours in advance but do not crumble the topping over the filling until ready to bake.
Recipe courtesy of Bride & Groom Cookbook
Today I was listening to the Beatles song, “When I’m 64” and thought of you, even though today you would have turned 65!
As you know being the Beatles fan that you were, the refrain to the song goes, “Will you still need me, will you still feed me, when I’m 64.”
And, even though you’re 65, I like to think I am still feeding you vicariously every day. You inspire my cooking and were the inspiration for me to begin this blog. Whether it is the apple crumble I made a few weeks ago (recipe is below if you want to make it for your friends up there or the Big Guy … if he could turn water into wine, who knows what he could do with this crumble), your orzo salad or trying something new like Indian Chicken. You are with my every time I enter the kitchen.
You’ve also made me realize the importance of including my son and your grandson, Davis, in the cooking process. He loves to be in the kitchen to see what is going on. He has now mangled my whisk which has become his beloved kitchen tool of choice. You would be so proud of the way he manhandled his tortellini last weekend. Here's a picture of the aftermath:
As I have on your birthday since you passed away way too soon almost six years ago, I went out to lunch with Dan to celebrate what would have been your 65th year. I know, I know. I am sure you did think I was really just looking for an excuse to eat an insanely delicious, gluttonous lunch. That’s only partly true.
Today we celebrated your life by eating a few of your favorite things that you taught me to enjoy and toasting to you. I had a divine pizza with provolone cheese and homemade soppresata. You would have loved it. Salty and authentic perfection. I can still remember when you introduced me to soppresata for the first time at 9 years old at Glorioso’s, a small Italian grocery store in Milwaukee. I could hardly pronounce the word but oooooooooh did I love that piece of Italian goodness that the lady behind the deli counter sliced for me. I remember that you said to me, “See Little Flower, you try something new and you might like it. I would never lead you astray when it comes to food.” As usual, you were right.
And then, we finished with a homemade cannoli, one of your all-time favorites, for dessert today. No, we didn’t share one either. We each ordered our own because you always thought people shouldn’t have to share if they didn’t want to … they should order their own, no matter the cost and in your words, “ENJOY, DAMNIT because you only live once!”
And how true those words are. You showed me how to live life to the fullest, particularly when it came to food -- both eating and consuming it.
To enjoy every meal like it was your last.
To worry about watching your weight another day but definitely not on the day when you had the chance to eat something amazing or try a new dish for the first time.
To understand how feeding people brings a group together.
As for the other part of the Beatles song (‘Will you still need me?’), the answer is Y-E-S.
Even at 31 years old, I need my dad. Thanks to your gentle nudging from above, I have found that the way to stay connected to you is through cooking. And it has brought me more comfort and enjoyment than you will ever know. Thank you for pointing me in the right direction and I will keep ‘feeding you’ from down here.
Xoxo
Little Flower (a.k.a. your daughter, Colleen)
Dad's Birthday Apple Crumbly
(Serves 6 to 8)
![]() |
| The remains of the Apple Crumbly |
Filling
5 Granny Smith Apples, peeled, cored and cut into 1-inch pieces
1/2 cup granulated sugar
1 teaspoon vanilla extract
1 1/2 teaspoons ground cinnamon
1/2 teaspoon ground nutmeg
1/4 teaspoon kosher salt
2 teaspoons fresh lemon juice
Crumble topping
1 stick unsalted butter
1 cup light brown sugar
1/4 teaspoon kosher salt
1 cup all-purpose flour
1/3 cup rolled oats or quick cooking oats
Details
*Preheat the oven to 350 degrees.
*To make the filling, combine the apples, granulated sugar, lemon juice, vanilla, cinnamon, nutmet and kosher salt in a baking dish and mix well.
*To make the streusel topping, melt the butter.
*Remove the butter from heat and stir in the brown sugar and kosher salt. Add the flour and oatmeal and stir until incorporated.
*Crumble the mixture over the apple filling. Place the baking dish on a baking sheet and bake until the topping is golden brown and the filling is bubbling for 50 to 60 minutes.
**Weekend Gourmet's note: You can make the filling 6 to 8 hours in advance but do not crumble the topping over the filling until ready to bake.
Recipe courtesy of Bride & Groom Cookbook
Thursday, August 12, 2010
Giving in to the Cupcake Craze with Bite-size Goodness!
Has anyone else noticed that cupcake mania has consumed our country? No longer are cupcake consumers relegated to the sad looking cupcakes in the plastic containers at the grocery store topped with inedible wannabe buttercream frosting and sprinkles or tacky seasonal decorations. Instead, cupcakes of every imaginable flavor are accessible topped with real-deal buttercream or cream cheese frosting.
I should preface this by saying that I got burned out on cupcakes by the end of middle school. It seemed like for every birthday of a student in the classroom, we were “treated” to cupcakes. Yellow cake cupcakes with bad chocolate frosting or dry chocolate cupcakes with boring and sad buttercream frosting.
So it took a lot for me to try a cupcake again and I was very skeptical.
Clearly, the cupcake has been due for an extreme makeover for quite a while.
Or at least it needed one before I could look at a cupcake again.
And I have to admit, I got swept up in the craze a couple years ago. As you may know, Washington, DC is home to the now famous-because-of-a-reality-tv-show, Georgetown Cupcake. I am a frequent consumer of their vanilla cupcake with the most glorious cream cheese frosting you could ever imagine.
A recent visit to Georgetown Cupcake prompted me to try to make my own cupcakes. After waiting in the car with our son while my husband braved a one hour wait in a neverending line for the goodness that is a Georgetown Cupcake, I decided it was time to take matters into my own hands. The Georgetown Cupcakes were absolutely delectable but sitting in the car for an hour with a little boy who is ready to go to bed and desperately wants his nighttime bottle and pajamas is not pretty and not fair to the Little Man! Before Davis, it wouldn't have been the end of the world to wait in line that long but life with a one-year-old changes these little luxuries.
Sadly, the answer is yes, they are that good. However, the waiting game is definitely not practical most days in our life.
I finally decided to take matters into my own hands. This is how I found myself making mini-vanilla mascarpone cupcakes with a strawberry glaze on a recent Saturday afternoon. In fact, I served them as an extra dessert at Davis' birthday party as they are so good.
The recipe is very simple and the mascarpone cheese is definitely the secret weapon to keep the mini-cupcakes moist. Plus, the addition of the strawberry glaze which tops the cupcake doesn't overwhelm the cake portion but adds a little tinge of sweetness. The end result is 48 bites of cupcake goodness. Yes, you can really eat the mini-cupcake in one bite, too.
I loved the idea of mini-cupcakes because as I found, I didn't feel as bad popping five mini-cupcakes in my mouth as I did eating two regular-size cupcakes. In addition, if you serve these for a party, tea or even as a light dessert at a late morning/early afternoon brunch, they are easy to eat without creating a mess when you are trying to chat with folks.
The best part is these will take you approximately 30 minutes from start to your mouth. As I found, preparing the mini-cupcakes in the comfort of my own home in less time and for less money than it costs to buy four Georgetown Cupcakes is a win-win situation.
Vanilla Mascarpone Strawberry Mini-Cupcakes
Makes 48 mini-cupcakes
For the mini-cupcakes:
8 oz mascarpone cheese, softened
2 egg whites
1/4 cup vegetable oil
1 box white cake mix
1 cup water
For the glaze:
1/3 cup frozen strawberries, unfrozen and strained
2 1/2 cups powdered sugar
*Preheat oven to 350 degrees.
*Spray mini-muffin pan with cooking spray
*Combine mascarpone cheese, egg whites and vegetable oil in bowl of a standing mixer.
*Once blended, add in white cake mix and water. Mix until smooth.
*Using a small cookie scoop, scoop the dough into the muffin pan.
*Bake for 18-30 mins.
*While cupcakes cook, puree strawberries in a food processor.
*Mix strawberry puree with the powdered sugar and refrigerate for 20 minutes.
*Once cupcakes are cool, dip the tops in the strawberry glaze.
Recipe courtesy of Giada de Laurentiis
Thursday, July 22, 2010
A Chocolate Cake Fit for a Sous Chef
When my son was born a little over a year ago, I made a pact with myself that I would teach him the joys of food that my dad taught me. Since my dad is no longer with us, I felt that it was my duty to make sure Davis understands that not only does food nourish us physically, it feeds our soul and is a wonderful way to bring people together.
One of the joys of being a mom has been introducing my son to new foods and watching him either cringe with disgust or open his mouth and lean forward like a baby bird looking for more food while pounding the tray of his high chair in a MOMMYIWANTMORERIGHTNOW manner as he sought out more of the food that he decided he liked. It may be silly, but I rejoiced the day he ate a homemade quesadilla that he watched me prepare for him.
As my son grew over this past year, I made him a part of anything I was doing in the kitchen, just as my dad had done with me. Once Davis started to enjoy his bouncy seat at around 1 1/2 months old, he would sit perched on the island in our kitchen as I prepared dinner for myself and my husband watching with interest as I chopped and sauteed.
As he got bigger, I gave him a spatula to play with while I cooked. He was in the kitchen with me as we prepared pumpkin pie for Thanksgiving. He even started to cry after my husband moved him to his toys away from the kitchen action ... the child didn't want to miss a thing in the kitchen! He has evolved into my taste-tester as well. On Christmas Day, he sampled the harvest squash bisque I prepared. Davis was also my company at 5 am as I rose early to begin prepping a Southwestern Brunch for our New Year's Day party. As he grew out of his bouncy seat, he began supervising the action from his exersaucer, jumping up and down whenever he heard the whir of the food processor or the standing mixer.
As he began walking over the past few months, Davis plants himself underfoot in the kitchen as I prepare lunch for him, dinner for our family or prep for a party. He even loves kitchen tools like I do as observed from his fascination with my whisk (which has now seen better days since he got his hands on it), spatulas and mixing bowls.
Given my love of food that I am passing on to Davis, I felt an intense need to make Davis' first birthday cake from scratch and ensure it would be especially delicious should he decide to take a bite of the chocolate goodness that awaited him. So as not to be disappointed if Davis dissed his cake, I did keep in mind that although I enjoy sweets a great deal now, I was the child who would pass up ice cream in lieu of french fries during summer trips to the Dairy Queen.
For my little sous chef's birthday, I prepared a decadent double-layer chocolate cake with a recipe I found on the back of a Ghirardelli unsweetened cocoa powder can. And delicious and decadent it was.
Now, please do not think this cake is just for kids. It is not. As expected, my son didn't even take a bite. The adults at the party seemed to enjoy the cake immensely. The cake turned out moist and rich with a perfect chocolate flavor. I frosted it with a vanilla buttercream frosting which was the perfect compliment to the cake. I also channeled my inner Martha Stewart and with an idea from her website and made the frosting a light blue color and placed fish made of sugar cookies on the side of the cake. To top it all off, I used her blueprint to make a paper sailboat to top the cake. Origami is not my strong suit but it turned out pretty good! Feel free to omit the fish, blue food coloring and origami and you will have a very chic chocolate cake to serve your guests.
The cake is extraordinarily easy to make as is the frosting. I did make the cake a day ahead and frosted it the day of the party and it still tasted perfect. Davis was not content to watch the cake-making from the floor of the kitchen so I ended up making most of it while holding him. The whir of the mixer caught his attention and he wanted to be eye-level with whatever was mixing up the sweet goodness that would become his birthday cake.
When I went to frost the cake the next day, I gently sliced off the top of one of the layers so that the other would lay flat upon it. My mother-in-law passed on a great tip when I shared with her my frustration of chocolate crumbs in my blue frosting acquired as I tried to frost the cake with care. She suggested freezing the cake though not fully and then frosting so that the crumbs would not come up off the cake as I frosted.
At last the big moment came for cake and we had to pry Davis away from his 1950s diner/kitchen he received as a birthday gift where he had been playing intently for over an hour. Once "Happy Birthday" had been sung, the Birthday Boy looked at the cake with minimal interest, attempted to touch the still burning candle, and rebuffed my efforts to encourage him to take a bite or play with the frosting. He then squirmed out of my arms and high-tailed it back to his playroom and got back to whatever he was cooking up in his kitchen to entertain his guests.
And I couldn't have been more proud of my son and partner in crime in the kitchen.
I can't wait for another year of kitchen adventures with my cooking partner in crime and the best sous chef a Mommy could ask for.
Davis' Birthday Cake
(Serves 8-10)
Ingredients
3/4 cup unsweetened cocoa powder
2 cups all-purpose flour
1 3/4 cups sugar
1 teaspoon baking powder
1 teaspoon baking soda
1/2 teaspoon salt
1 cup butter, softened
1 1/3 cup whole milk
2 large eggs
2 teaspoons vanilla
Details
*Preheat oven to 350 degrees.
*Lightly flour and grease two 9-inch round cake pans.
*In a medium blow, combine flour, cocoa, baking powder, baking soda, and salt. Set aside.
*In a large bowl, cream butter and sugar on a medium-high speed until light and fluffy, about 4 minutes.
*Reduce speed to low and add vanilla and eggs one at a time, scraping bowl after each addition.
*Alternately add flour mixture and milk (starting and ending with the flour mixture), while on low speed.
*Continue to mix until smooth. Pour into prepared pans. Bake for 30 to 35 minutes or until a cake tester inserted in the center of cake comes out clean.
*To frost, wait until cakes are fully cooled. Place one cake on a plate and cut off top so it is flat. Spread frosting on cake, top with second cake. Using an offset spatula, continue frosting.
Vanilla Buttercream Frosting
(enough to cover two 9-inch cakes)
Ingredients
3 cups confectioner's sugar
1 cup butter
1 teaspoon vanilla
1-2 tablespoons heavy cream
Details
*In a standing mixer fitted with a whisk, mix together sugar and butter. Mix on low speed until well blended and then increase speed to medium and beat for another 3 minutes.
*Add vanilla and cream and continue to beat on medium for 1 minute more, adding more cream if needed for spreading consistency.
Cake recipe from Ghirardelli Grand Fudge Cake recipe. Frosting recipe from Gale Gand, Food Network.
Wednesday, June 16, 2010
Crumblies, Anyone?
My dad LOVED dessert. Carrot cake may have been his favorite dessert (which will be another post down the road as I have found a delish carrot cake recipe) but not far behind was anything with "crumblies" on top.
Crumblies?
You know, the delicious streusel-like topping that is a combination of brown sugar, rolled oats, flour, a pinch of cinnamon and a whole lot of butter to hold it all together.
He always loved the apple pie my mom made that didn't have the traditional lattice-work on top but rather the crumblies. I've acquired my dad's love of crumblies and to me, the filling of fruit is the sideshow but the delicious topping is the main attraction! In typical fashion, my dad would justify this as an almost healthy dessert because it involved fruit.
This past weekend, I made a Strawberry and Peach Crumble that I know my dad would have loved. My son was napping and I had a craving for something sweet but couldn't run to the grocery store while he was asleep so I had to make do with the ingredients I had in the house. I happened to have a container of strawberries that was in need of being eaten within two days or thrown away and I hate to waste so into the Crumble they went! Then, I moved on to the freezer. We are moving in a couple weeks so I am trying to use up as much food as possible pre-move. Lo and behold, there was a bag of frozen peaches I had purchased when I thought my son might have an interest in trying peaches. Turns out, he had no interest. So, into the Crumble went the peaches.
I found a great recipe to pull together my random fruit assortment online. God bless "The Google." It turns out, Giada De Laurentiis must have found herself in the same position one day and she made a dessert with strawberries, peaches and a crumble topping. Occasionally when I have made an Apple Crumble, the topping is a bit more high maintenance and involves blending by hand, but this was very easy. I simply blended brown sugar, flour, and a stick of butter in the food processor while holding my breath that the whir of the food processor wouldn't wake up my sleeping son. Thankfully, it didn't and about 40 minutes later, I took the bubbling, sweet Crumble from the oven and had a very nice treat as my son napped. While I was sitting eating this glorious dessert, I couldn't help wishing my dad was with me to share in some strawberry and peaches with crumblies. But, proving that he is with me and that my son is like him in so many ways, I gave Davis a bit of Crumble after his nap and he loved it.
It seems that even at 11 months old, crumblies are just too good to pass up!
Here is the recipe:
Strawberry and Peach Crumble
Ingredients
Filling
2 tablespoons fresh lemon juice (about 1/2 large lemon)
1.5-2 tablespoons corn starch
1 pound strawberries, halved
1 pound frozen peach slices (feel free to use fresh later this summer once they are in season)
1/2 cup light brown sugar
Topping
2/3 cup all-purpose flour
2/3 cup old fashioned style oats
1/4 cup light brown sugar
1 teaspoon ground cinnamon
1/4 teaspoon sea salt
1 stick unsalted butter, chilled, cut into 1/2 inch cubes
Details
*Preheat oven to 350 degrees and spray medium baking dish, similar to this one with cooking spray.
*For the filling whisk together the lemon juice and corn starch until smooth.
*Add the strawberries, peaches and brown sugar and toss until fruit is coated. Pour the mixture into the dish.
*For the topping, combine the oats, brown sugar, cinnamon and sea salt in a food processor. Pulse until mixed.
*Add the butter and pulse until the butter is the size of peas.
*Sprinkle th emixture over the filling and bake for 40 to 45 minutes until the filling is bubbling and the top is light golden.
Recipe adapted from Giada De Laurentiis' Strawberry and Peach Crumble recipe
Crumblies?
You know, the delicious streusel-like topping that is a combination of brown sugar, rolled oats, flour, a pinch of cinnamon and a whole lot of butter to hold it all together.
He always loved the apple pie my mom made that didn't have the traditional lattice-work on top but rather the crumblies. I've acquired my dad's love of crumblies and to me, the filling of fruit is the sideshow but the delicious topping is the main attraction! In typical fashion, my dad would justify this as an almost healthy dessert because it involved fruit.
This past weekend, I made a Strawberry and Peach Crumble that I know my dad would have loved. My son was napping and I had a craving for something sweet but couldn't run to the grocery store while he was asleep so I had to make do with the ingredients I had in the house. I happened to have a container of strawberries that was in need of being eaten within two days or thrown away and I hate to waste so into the Crumble they went! Then, I moved on to the freezer. We are moving in a couple weeks so I am trying to use up as much food as possible pre-move. Lo and behold, there was a bag of frozen peaches I had purchased when I thought my son might have an interest in trying peaches. Turns out, he had no interest. So, into the Crumble went the peaches.
I found a great recipe to pull together my random fruit assortment online. God bless "The Google." It turns out, Giada De Laurentiis must have found herself in the same position one day and she made a dessert with strawberries, peaches and a crumble topping. Occasionally when I have made an Apple Crumble, the topping is a bit more high maintenance and involves blending by hand, but this was very easy. I simply blended brown sugar, flour, and a stick of butter in the food processor while holding my breath that the whir of the food processor wouldn't wake up my sleeping son. Thankfully, it didn't and about 40 minutes later, I took the bubbling, sweet Crumble from the oven and had a very nice treat as my son napped. While I was sitting eating this glorious dessert, I couldn't help wishing my dad was with me to share in some strawberry and peaches with crumblies. But, proving that he is with me and that my son is like him in so many ways, I gave Davis a bit of Crumble after his nap and he loved it.
Here is the recipe:
Strawberry and Peach Crumble
Ingredients
Filling
2 tablespoons fresh lemon juice (about 1/2 large lemon)
1.5-2 tablespoons corn starch
1 pound strawberries, halved
1 pound frozen peach slices (feel free to use fresh later this summer once they are in season)
1/2 cup light brown sugar
Topping
2/3 cup all-purpose flour
2/3 cup old fashioned style oats
1/4 cup light brown sugar
1 teaspoon ground cinnamon
1/4 teaspoon sea salt
1 stick unsalted butter, chilled, cut into 1/2 inch cubes
Details
*Preheat oven to 350 degrees and spray medium baking dish, similar to this one with cooking spray.
*For the filling whisk together the lemon juice and corn starch until smooth.
*Add the strawberries, peaches and brown sugar and toss until fruit is coated. Pour the mixture into the dish.
*For the topping, combine the oats, brown sugar, cinnamon and sea salt in a food processor. Pulse until mixed.
*Add the butter and pulse until the butter is the size of peas.
*Sprinkle th emixture over the filling and bake for 40 to 45 minutes until the filling is bubbling and the top is light golden.
Recipe adapted from Giada De Laurentiis' Strawberry and Peach Crumble recipe
Tuesday, June 1, 2010
A Timeless Tart (a.k.a. The Little Black Dress of Desserts)
Fast forward to Monday morning at my apartment. I set out this weekend to make a key lime pie topped with fresh raspberries with a graham cracker crust accompanied by a raspberry coulis. However, my plan was derailed when I could not find key lime juice at multiple grocery stores and I did not have time to hit a specialty store like Dean and DeLuca or Balduccis.
These are the moments when you need a tried and true dessert recipe to call on. I try not to make the same dessert twice for the same group of people. To me, part of the fun of cooking is to try making new things to challenge myself and to get feedback from people on the new culinary offering. Given my key lime juice predicament, I came back to my Timeless Tart recipe. As I clicked through my online recipe box, it felt like going to my closet and finding the black dress I had forgotten about for a last minute party and putting it on and having it fit perfect, feel good and look fabulous with a few new accessories!
My Timeless Tart is a true classic. And, fairly easy to make. Until I found this recipe, the thought of making a tart was quite intimidating. I had always seen the beautiful French tarts in patisseries and bakeries and marveled at the artistic arrangement of the fruit and the beautiful tart crusts that held the creamy filling.
I used an 11 inch tart pan for this recipe but you could certainly use a smaller tart pan or even individual tart pans.
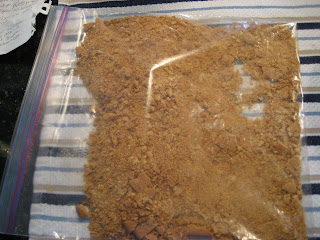
The crust for this tart is simple. If you can crush graham crackers and melt butter in the microwave and have sugar on-hand, you’ve got yourself a tart crust. I deposited my graham crackers in a ziploc bag and used the flat side of a meat tenderizer to crush the graham crackers in the bag.
The final piece of the tart is the topping or the “accessories”. Feel free to use anything! If you’ve planned, pick up certain kinds of fruit at the store and create a design like the one on the tart I have made using blueberries, raspberries and blackberries. Or, if you have odds and ends of fruit in your refrigerator, go for a more “rustic” look and sprinkle the fruit here and there on the tart.
Ingredients3 cups graham cracker crumbs
4 ½ tablespoons granulated sugar
1 ½ sticks (12 tablespoons) unsalted butter, melted
6 tablespoons packed light brown sugar
¾ cup sour cream
¾ teaspoon vanilla
12 oz cream cheese, softened
3 teaspoons finely grated lemon zest
Fruit of your choice for topping
Details
*Preheat oven to 350 degrees with a baking sheet on the middle rack.
*Stir together the graham cracker crumbs, granulated sugar and butter in a bowl with a fork until combined well.
*Press mixture with your fingers and back of a spoon evenly and firmly onto bottom and up the sides of the tart pan.
*Put tart pan on the baking sheet and bake the crust until slightly darker, approximately 10 minutes. Remove from the oven and cool the tart crust. Gently push the bottom of the pan to loosen crust and place on a plate.
*While the crust cools, whisk together the brown sugar, sour cream and vanilla in a small bowl until the sugar is dissolved.
*Beat the cream cheese in a medium bowl with an electric mixer until smooth and then add the sour cream mixture and lemon zest. Beat until smooth and combined well.
*Spread mixture into tart crust and decorate with fruit topping.
*Chill until serving.
Recipe adapted from Gourmet, July 2003
Subscribe to:
Posts (Atom)