Thursday, April 7, 2011

A suitable substitute for Elephant Tracks

My dad had a little bit of a sweet tooth. I think that may be the understatement of the century.

In particular, dad loved ice cream. His all-time favorite happened to be a flavor called Elephant Tracks made by a local ice cream purveyor, Cedar Crest. Elephant Tracks featured chocolate ice cream with peanut butter cups. Divine, right? Who doesn’t love chocolate and peanut butter? The combination no matter how you prepare it is one of my favorites to this day.

I am not sure how many half-gallons of Elephant Tracks dad ate in a month, but it was a lot. He was obsessed.

One day, I went with dad to the local Piggly Wiggly (The Pig) grocery store to pick-up a half-gallon of Elephant Tracks. But it was nowhere to be found.

Yikes. Dad was not pleased. But he didn’t end his pursuit at the The Pig. He was on a mission. A man hunting for his prey, Elephant Tracks.

We went to the Pick ‘n Save in Saukville. No luck. The Sentry grocery store in Port Washington. No dice. Back to Saukville to the Tri-Par gas station and convenience store. Still no Elephant Tracks.

His prey was proving elusive. And this was not cool.

Dad was flustered, his face getting redder by the minute as we drove around in pursuit of the ice cream. Where in the world was his beloved Elephant Tracks? Dad had a bit of a temper and was definitely peeved that the Ice Cream Gods were clearly conspiring against him to keep him from his flavor of choice. We were out of ideas and heading home until suddenly Dad said, “We are going straight to the source! Let’s go to the Cedar Crest distribution center.”

Off we went to Cedarburg. And he was speeding. We pulled into the parking lot and Dad jumped out of the car probably faster than I had ever seen him move. We went in and quickly scanned the cases holding the ice cream. Eureka! We found two half-gallons of Elephant Tracks. Dad’s face lit up! Mission accomplished. We went to pay for the ice cream and dad described the odyssey we had been on for Elephant Tracks and how relieved he was to have found his ice cream.

But the bliss didn’t last long. The cashier told Dad that the Elephant Tracks flavor was being discontinued.

The utter despair that crossed Dad’s face is unforgettable. We walked out of the store, still happy to have the last two half-gallons of Elephant Tracks in existence but knowing he would have to find other ways to get his peanut butter and chocolate combination fix.

I had completely forgotten this story until last month when I found myself with a craving for chocolate and peanut butter. If Dad were still with us, I know he would have thought this dessert was a homerun and a solid replacement for Elephant Tracks.

With Dad in mind, I created a no bake peanut butter and chocolate cookie pie with a graham cracker crust. It was sinful and easy. I could have eaten the filling by the spoonful. Well, I actually may have done just that with the leftover filling. Okay, okay, I did eat about five leftover spoonfulls. And it was glorious!

No Bake Peanut Butter Chocolate Cookie Pie
(Makes one 9-inch pie and serves 6-8 people depending on how big you cut the slices)

**Please note that instead of making the crust from scratch, you can also use a store-bought graham cracker crust. Also, I used Newman’s brand chocolate cream cookies but you can use Oreos instead.

Ingredients

Graham Cracker Crust
*1 and 2/3 cups graham cracker crumbs
*1/4 cup sugar
*1/4 cup plus 2 tablespoons butter, melted

No Bake Peanut Butter Chocolate Cookie Pie Filling and Topping
*1 (8 ounce) package cream cheese
*1 ½ cups confectioners’ sugar
*1 cup creamy peanut butter (I like Jif)
*1 cup milk
*1 cup heavy whipping cream
*1 teaspoon vanilla
*10 chocolate cream cookies (either Newman’s Chocolate Cream Cookies or Oreos)
*Optional: melt some chocolate chips and use to drizzle over pie
Details

For Graham Cracker Crust:
Using a food processor, crush enough graham crackers to yield 1 2/3 cups crumbs. Alternately, you can put the graham crackers in a bag and crush them with a rolling pan.

Melt butter and then in a bowl, combine sugar, butter and graham cracker crumbs until well-blended.

Transfer mixture to 9-inch pie pan and press crumb mixture into bottom and sides until evenly distributed. Set aside.

For No Bake Peanut Butter Chocolate Cookie Pie Filling and Topping:
Using VERY soft cream cheese, beat together cream cheese and confectioners’ sugar in a standing mixer or with a hand mixer.

Once cream cheese and confectioners’ sugar is well beaten and almost fluffy, mix in peanut butter and milk. Beat until smooth. Transfer to a bowl.

In the bowl of the standing mixer, pour in heavy whipping cream and vanilla and beat until peaks form and mixture is fluffy.

Transfer whipped cream mixture to the cream cheese and peanut butter mixture and gently fold in the whipped cream. Once combined, transfer mixture to the pie crust and spread evenly in the crust.

In a food processor, 4 of the chocolate cream cookies until they are crumbs. Alternately, you can put the cookies in a Ziploc bag and crush with a rolling pin.

Take the cookie crumbs and sprinkle over the top of the pie. Place the six whole cookies in the pie (see picture above). It makes the pie look pretty but you can easily skip this step.

If you need a little more chocolate, melt a handful of chocolate chips and then using a spoon, drizzle the melted chococolate over the pie.

Cover pie with plastic wrap and place in freezer for at least two hours or as long as you can stand to wait for this delicious pie.

Adapted from AllRecipes and Cooks.com

Saturday, April 2, 2011

Stirring the oatmeal

One of the most profound pieces of advice anyone offered my husband and I regarding marriage came a few minutes before we were officially married in November 2006. We stood together, ready to say our vows but first, the minister, Rev. Luis Leon gave his sermon.

His advice was simple: keep stirring the oatmeal.

In other words, remember that marriage isn’t like instant oatmeal where you heat it up and in minutes, you have the finished product and you can dive into the bowl of oatmeal.

Marriage isn’t no muss, no fuss like when you open the instant oatmeal package.

Rev. Leon said marriage is like steel-cut oatmeal. You need to have patience and tend to the steel-cut oats, stirring constantly. Life gets more complicated as the years go by and you need to keep "stirring" your marriage and take time to work on your relationship whether through dinner dates or other small, thoughtful gestures to each other and not put your relationship on the back burner thinking your marriage will stay as good and strong as the day you were married.   Like steel-cut oatmeal, marriage is not an instant gratification endeavor but rather an instance where putting in continued effort makes the outcome even better.

And I couldn’t agree more as it pertains to oatmeal and marriage and now, parenting. Before our son came along, tending to our marriage was fairly easy. We only had to deal with our jobs when it came to competing interests for spending time with each other. Now, it is also balanced with spending time with our son Davis.

As working parents, Dan and I both feel a pull to spend as much time with our son as possible when we are not working. And making this quality time is paramount. We try to keep work far from our minds and blackberries/iPhones out of the picture so that we can focus on Davis and not be distracted in anyway.

I think of this as stirring the oatmeal, family-style. Passive parenting or having a marriage where you don’t put in effort to keep working on your relationship with your spouse is easy to slip into with how busy lives have become.

But I really try to keep stirring.

I’m not saying it is easy. It’s not. And some days are better than others.

I will admit that it’s definitely a balancing act most days between being a wife, mother and building my fundraising consulting business. I’m constantly looking for ways to keep stirring the oatmeal with my husband and our son. For me, it’s not about doing big things. I have found that small gestures throughout the week make the biggest difference. A lot of times, this is where food comes in.

Which brings me to a rainy early Thursday morning at my house a few weeks ago. Dan had a very busy week at work and was likely to miss lunch that day because of a hectic schedule. Davis was battling a cold. Because of needing to get to work and wanting to play with Davis versus cooking, it is rare that on a weekday morning I have a chance to cook breakfast from scratch for my family. Nothing out of a package feels as special as, say, pancakes or French toast. Knowing my family needed a pick-me-up, I headed straight to the kitchen and began making the most divine oatmeal pancakes.

I do realize that oatmeal pancakes seem a bit unconventional. I pride myself on being a pancake connoisseur and these are unreal. The added benefit is pancakes that are more filling because of the oats and better for you without sacrificing flavor.

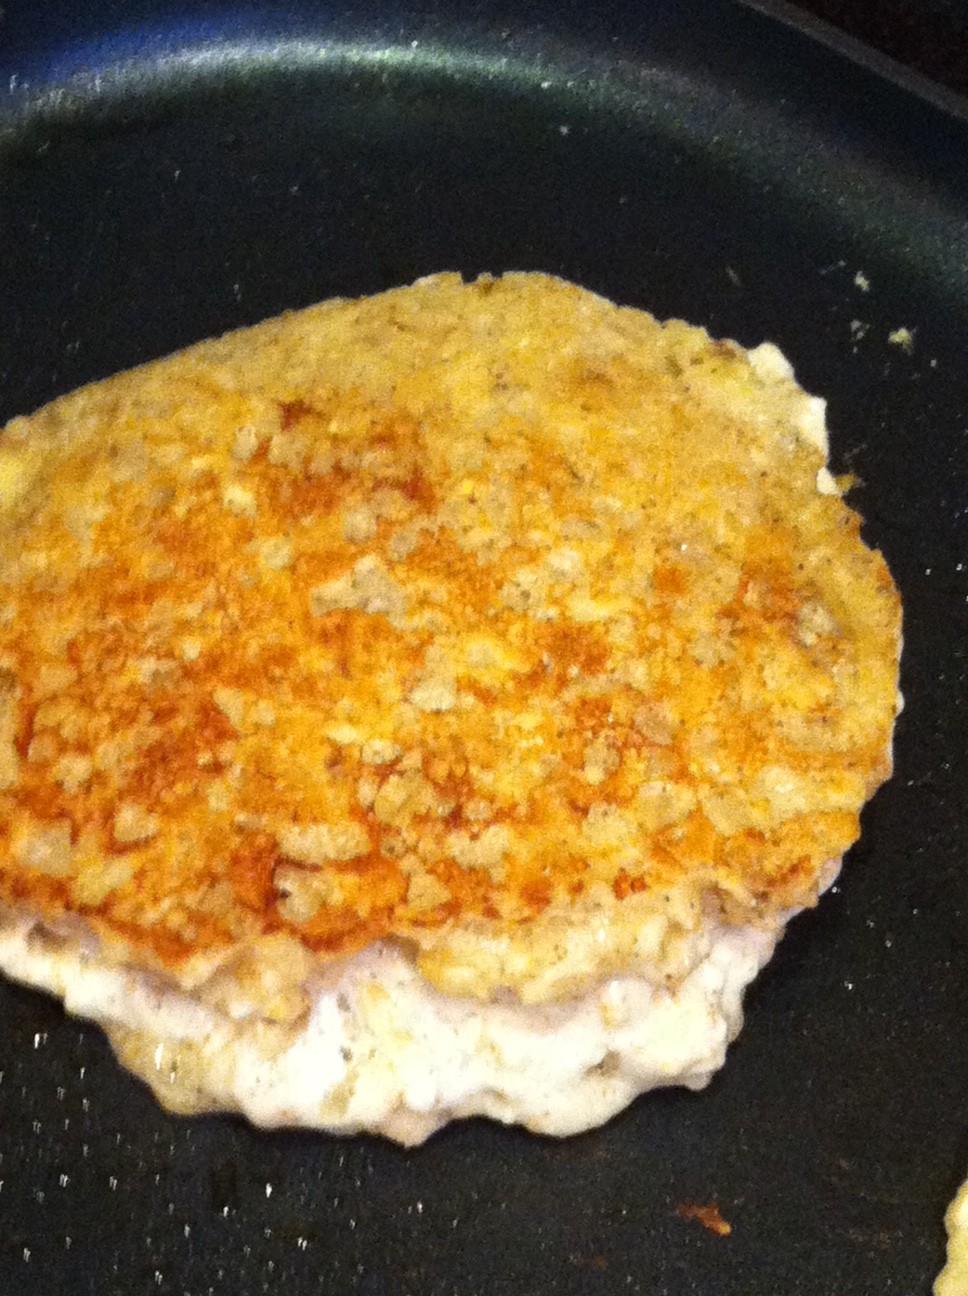
While Dan got ready for work, Davis and I hit the kitchen and put the pancakes together. The pancakes took about 5-10 minutes to put together the batter. I substituted fat free plain yogurt for buttermilk and the result was fluffy, moist pancake perfection.

As the three of us ate our pancakes together, I had a moment where I felt more fulfilled than usual and realized in their own way, Dan and Davis both appreciated the special mid-week breakfast. I never knew cooking pancakes from scratch in the middle of the week could make me feel so good. I can’t quite put my finger on it but for whatever reason, I felt like life was in balance at that moment. I had done something in the middle of the week I normally don’t have time to do as a working parent.

Davis enjoying his pancakes.
It made my heart feel full. I had stirred the proverbial oatmeal with my family with a small gesture and in doing so, surprised myself with just how good a rainy Thursday morning can be by 7 am.
Oatmeal Pancakes
(Yields 3 servings of two pancakes each)
**I do realize the irony that this recipe uses quick-cooking oats.
Ingredients
1/4 cup all purpose flour
1 cup quick-cooking oats
1 tablespoon sugar
1/2 teaspoon baking powder
1/2 teaspoon baking soda
1 teaspoon cinnamon
1/8 teaspoon salt
1 cup nonfat plain yogurt
2 tablespoons butter, melted
1 large egg

Details
Combine first seven ingredients in a medium bowl and stir with a whisk.
Combine yogurt, melted butter and egg in a smal bowl.  Add to flour mixture, stirring just until moist.
This is what the batter will look like:
Heat a nonstick griddle over medium heat.  Coat pan with cooking spray.  Spoon about 2 tablespoons per pancake onto griddle.

Turn pancakes over when tops are covered with bubbles; cook until bottoms are lightly browned.
Garnish with fresh berries and/or maple syrup.
Adapted from Cooking Light

Wednesday, February 16, 2011

About those bananas ...

I know you've all been there before.  The bananas you bought last weekend with oh so good intentions of eating are still sitting in your fruit basket when the week ends.  And they sure aren't looking as appetizing as they did in the middle of the week when the peel was still bright yellow and devoid of brown spots.

You probably contemplated eating one at that moment. But then opted for Swedish Fish. 

Oh wait, that was me.  My choice of an unhealthy snack over a healthy snack is also what led to the surplus of browning bananas on my counter last weekend.

Now,  about those bananas.

What to do, what to do?

Then, I remembered that one of the universally agreed upon best uses for very ripe bananas is to make banana bread.

And that is exactly what I did last Saturday.

I've made a lot of banana bread in my day using many different recipes.  I was baking the bread during my son's naptime and therefore couldn't hit the store for ingredients.  I also needed a recipe that was healthier than some I had made in the past so it would be a good snack for both me and my son.

The recipe I used cut the amount of vegetable oil dramatically but suggested using buttermilk.  Since this isn't the days of Little House on the Prairie and hence, I don't keep buttermilk readily available, I used non-fat plain yogurt as a substitute.

As I've expressed in the past, I get nervous about healthifying (is that a word?) recipes but this modified recipe was a home run!

If you find yourself with a pile of overly ripe bananas this weekend, give this recipe a try.  I bet it will be your new banana bread recipe.

When presented with the choice of a naptime snack of my freshly baked banana bread or the remaining Swedish Fish, I opted for the bread.

Now that's saying something.

Banana Bread

Ingredients

2 large eggs
3/4 cup sugar
2-3 medium ripe bananas, mashed
1/3 cup non-fat plain yogurt
1 tablespoon vegetable oil
1 tablespoon vanilla extract
1 3/4 cups all purpose flour
2 teaspoons baking powder
1/2 teaspoon baking soda
1/2 teaspoon salt

Details 
Preheat oven to 325°F. Lightly grease a standard loaf pan; dust with flour.

Using electric mixer; beat eggs and sugar in large bowl until thick and light, about 5 minutes.

Mix in mashed bananas, yogurt, oil and vanilla. Sift flour, baking powder, baking soda and salt over mixture; beat until just blended. Transfer batter to prepared pan.

Bake bread until golden brown on top and tester inserted into center comes out clean, about 1 hour.

Adapted from Bon Appetit

Saturday, February 5, 2011

Food for the Cheesehead's soul

In case you've been buried under a rock this week, tomorrow is the Super Bowl.

If you live in Wisconsin, you would have to be buried under said rock plus the 20+ inches of snow to not know that the state's beloved Green Bay Packers are playing in the Super Bowl tomorrow.

Growing up in Wisconsin, I was indoctrinated into the Cheese Head Nation by my dad.

Dad didn't love the Packers.  He LOOOOOVED the Packers.

He loved them when they were awful during the Don Majkowski era and when they were Super Bowl champs during the Mike Holmgren and Brett Favre era.  He was over the moon when he landed the Packers as a client during his days selling phone systems.  The only thing better for Dad was when his company purchased a luxury box at Lambeau Field and he was responsible for "hosting" the box.
Dad on the sideline at Lambeau Field.
Dad loved entertaining clients and watching the game from the box but most importantly, he controlled the ordering of food for the box.

As you know if you've been reading my blog, Dad loved food.  It isn't suprising that there was never a shortage of food in the box.  Shrimp, chili, hotdogs (and the list goes on).  And then, the desserts.  I seem to remember him being very focused on the mini cheesecakes.

He took the food duty very seriously.  Dad believed that no matter how good the game was, food was a critical element to truly enjoying football.

I couldn't agree with him more.  With that, I bring you a recipe for something green for you to make tomorrow in honor of the Green Bay Packers and their hopefully huge victory over the Steelers:

Split pea soup!

Even if your football team lets you down tomorrow, the commercials disappoint or there is an unfortunate wardrobe malfunction during the half-time entertainment, this soup will leave you satisfied and blissed out.

If you are a Steelers fan, I advise disregarding the symbolism of the color of the soup and still giving this a try.

If you really want to embrace the Cheese Head lifestyle, serve the soup with grilled cheese.  You can't beat this combo.

Split Pea Soup
(serves 6)

Ingredients
2 tablespoons butter
4 slices pancetta
2 cloves garlic, minced
1 cup diced white onion
1/2 cup diced carrots
1/2 cup diced celery
1 cup dried split peas
1 cup whole milk
1 large container chicken broth

Details
Melt two tablespoons butter in a large soup pot.  Add garlic, pancetta and onions.  Cook until pancetta and garlic are browned and onions are soft.

Add carrots and celery and cook until somewhat tender.

Place peas in a strainer.

Rinse split peas and add to the mixture in the soup pot.  

Add chicken broth to the mixture.  Cook on medium heat until the peas are tender.

Add one cup whole milk to the pot.  

Using an immersion blender, blend soup until chunky but not completely pureed.  Alternately, if you do not have an immersion blender, add the cup of milk to a small bowl and two cups of the soup mixture and use a masher until the mixture is chunky.  Add back in to the soup.

Cook soup on low and serve once it is warmed through and vegetables are tender.

Wednesday, January 19, 2011

Not all crostatas are created equal

It's been a while.

Christmas. New Year.  Food Poisoning. Starting a business.

And OOOOOH Honey.

If the holidays don't wear you out from cooking, the last two items in the last sentence will force you to take a break from getting crazy in the kitchen.  To clarify, the food poisoning was not the result of my cooking or for that matter, that of friends or family.  The  blame fell to the deli turkey from a local grocery store.  And alas, while the new business is not food-related, it is keeping me mighty busy and feeling challenged again in my professional life.

But now I am back!

I did a decent amount of cooking over Christmas though nothing like the Thanksgiving extravaganza.  My cooking exploits had mixed results.  I tried making cinnamon rolls for the first time and found out just how temperamental yeast can be.  Apparently, my beloved kitchen may not be the right incubator for yeast to do what it should do: rise!  After two rounds of making dough, including once at 10 pm on Christmas Eve, I realized I had killed my yeast.  I forged on and still made the rolls the next morning.  They turned out like little flat hockey pucks.  But let me tell you, ain't nothing that a pound of butter and cinnamon can't make better!  Flat or not, they were delish.  Anyway, when I can figure out how to get the dough to rise, I'll post the recipe.

In the meantime, I also learned that not all crostatas are created equal.  In the fall, I made a divine pear and fig crostata.  I mean, this dessert made my toes curl it was so good.  And it was so easy to make.  Easy crust with no dough drama.  Delicious filling with the slightly exotic flavor of cardamom.

So why did I not make this again for Christmas?  Good question.

I decided to use a different crostata recipe for my Christmas dessert.  It was an apple crostata and unfortunately, it was a mess.  It turned out okay once it was baked but it was a rocky road to making it look nice.  The dough was next to impossible to work with.  It was like a triage station in the kitchen on Christmas day as I tried to patch the dough of the crostata together to hold the filling in.  The finished product was ... well, fine.  But not the rock star quality of the crostata from the fall.

Try this absolutely divine pear and fig crostata.  I don't know if it is the cardamom or the way the crust gets golden brown because you brush it with heavy cream but everything about this dessert was perfect.  It is the ideal dessert to serve for a dinner party on a cold winter night.

Pear and Fig Crostata
The finished product in all it's golden brown, bubbly filling goodness glory!

Ingredients

Crust
1 2/3 cups unbleached all purpose flour
1/3 cup cornmeal
2 tablespoons sugar
1 teaspoon salt
3/4 cup (1 1/2 sticks) chilled unsalted butter, cut into 1/2-inch cubes
3 tablespoons (or more) ice water

Filling
1/4 cup (packed) golden brown sugar
1/4 cup sugar
2 tablespoons cornstarch
1 teaspoon (scant) ground cardamom
1/4 teaspoon ground cloves
1/4 teaspoon coarse kosher salt
2 1/4 pounds firm but ripe unpeeled Anjou pears (about 4), cored, each cut into 8 wedges
10 dried but moist Calimyrna figs (about 4 ounces), stemmed, quartered
Heavy whipping cream (for brushing)
Raw sugar
2 tablespoons honey

Details

For the crust:
Blend first 4 ingredients in processor. Add butter; using on/off turns, process until mixture resembles coarse meal. Remove lid; spoon 3 tablespoons ice water over mixture. Return lid to processor; using on/off turns, blend mixture until dough forms ball, adding more ice water by teaspoonfuls if dry. Flatten dough into disk; wrap in plastic and chill at least 20 minutes. 


For the filling:
Position rack in center of oven; preheat to 400°F. Whisk first 6 ingredients in large bowl. Add pears and figs; toss gently. Roll dough out on lightly floured parchment to 14-inch square or round. 

  • The fig and pear mixture in the rolled-out crostata crust.
    Transfer parchment with rolled-out crust to a baking sheet. Mound pear mixture with juices in center of crust, leaving 2- to 3-inch plain dough border. Using parchment as aid, fold dough up over edges of pear mixture, pleating edges and pinching to seal any cracks in dough, forming square or round. Brush crust edges with cream; sprinkle generously with raw sugar.
  • The crostata pre-baking with the sides pulled up around the filling and the outside brushed with heavy cream and sprinkled with raw sugar.
    Bake crostata until crust is golden, pears are tender, and juices are bubbling thickly, covering crust edges with foil if browning too quickly, 50 to 60 minutes. 

    Remove crostata from oven; drizzle 2 tablespoons honey over hot filling. Run long thin knife or spatula around edges of warm crostata to loosen. Cool crostata on parchment on baking sheet until slightly warm, at least 1 hour. Transfer to platter. Serve slightly warm or at room temperature.

Recipe courtesy of Bon Appetit

Wednesday, December 22, 2010

Six years ago

It's hard to believe but six years ago, I woke up on this day and had no idea that life was about to change dramatically.  It felt a lot like today does.  Still feeling the post-birthday glow (my birthday is five days before Christmas) and eagerly anticipating all that Christmas brings from food to presents to family.  Work has died down and it's safe to check out for a while.

Six years ago, I departed my family's house early to head to meet a dear family friend for breakfast. My dad was sleeping peacefully.  All was quiet.

And then an hour or so later, my cell phone rang and my world as I knew it crumbled. It's all a blur from that moment but I remember racing to the hospital, arriving where the ambulance had rushed my dad  and never imagining I was going to be told he had passed away.  I remember thinking on the drive to the hospital that maybe we would be spending Christmas in the hospital where he recovered from whatever this was, likely complications from his battle with cancer.  Not the Christmas we had expected but at least in that scenario, my dad was with us and we would make the best of it.

But that wasn't to be. And just like that, my dad was gone.

I sat with my family in a stupor in the grieving room with family and friends trying to digest what had just happened.  But it's not really something that one is able to digest when a loved one is taken away so swiftly.

It's hard for me to think back on that day.  For a long time, I didn't allow myself to replay those quiet moments we had with him after he had passed away and we had one last chance to see him and say our quiet goodbyes in a tiny room in the hospital.

To kiss his cheek one last time.  To hold his hand one last time.  To remove his wedding ring and tuck it in one of our purses in a safe place.  To walk out of the room and not have him follow us out the door.

It felt so final.  And the feeling of emptiness that filled my heart was overwhelming and I wondered if it would ever go away.

It's taken a while to rebuild all that crumbled on that day.

But today, this day feels better than it has in the past.  I find the emptiness is being filled by my beautiful son and my wonderful husband.  And, also filling that space is cooking and writing this blog.  It's been nice to find myself remembering things my dad liked to cook or cooking something I know he would have loved.

So, thank you for reading the blog and for your feedback.  It's been cathartic and I don't think I expected that when I started writing back in May.  You've inspired me to keep writing this blog and in the process, it has helped heal a broken heart and reminded me to celebrate my dad's spirit and his beautiful life.

Tuesday, December 21, 2010

A peppermint bark consumer is born

I've never been one to hold back when it comes to spending money on food.  Whether it is spending on ingredients or prepared food, I look at it as an investment in my happiness.

For several years, I have been a happy consumer of a certain culinary goods store's peppermint bark candy.  I gladly shelled out over $25 a box for the confection.  Sometimes, I even did it more than once during the holiday season.  In 2008, when I was two months pregnant with my son, I decided the peppermint in the candy was soothing for my stomach as I battled occasional morning sickness.  Some people turn to saltines, I turned to chocolate.

But this year, I decided to say no more.  I was curious if I could reproduce the candy myself in the comfort of my own kitchen.

My advice: save your pennies and make this peppermint bark at home.  My homemade version was as good as the store bought and maybe better because I knew it was fresh and hadn't sat in a box for weeks.

First I bought quality white and semi-sweet chocolate and chopped it.
Once I had chopped the chocolate, I added heavy cream to the chopped chocolate.
Then, I melted the dark chocolate in my makeshift double boiler with heavy cream.
 I don't use a double boiler often so I can't justify purchasing the real deal and my homemade version does the job.  Here's how it looks, consisting of a glass bowl and a sauce pan with water:
Once the semi-sweet chocolate was melted, I poured it on a cookie sheet that I had lined with a silpat mat (you could use parchment paper in place of a silpat if you prefer).  Then, the cookie sheet went into the refrigerator to chill for 20-25 minutes.

While the semi-sweet chocolate was hardening, I started melting the white chocolate.  I should add that the key to melting the chocolate is to stir it almost continuously so that it gets smooth and doesn't scorch.

Burnt chocolate is nasty.  Trust me.

Once the white chocolate is melted, I removed the cookie sheet from the refrigerator and spread the layer of white chocolate on top of the semi-sweet chocolate.  From there, I sprinkled on the peppermint candies I had crushed.  I crushed the candies by putting them in a ziploc bag, wrapping the bag with a kitchen towel and then smacking the bag with a meat tenderizer.  It did the trick and I was left with crushed candies and frankly perfect peppermint dust.

From there, the cookie sheet went back in the refrigerator and hardened.  Once it was ready to go, I broke off pieces of the bark with a knife and put it in a cute gift box to use as a gift for a party we were going to attend.
Unfortunately, I totally forgot to take the bark to the party.  When we returned home, my son discovered the box where I had left it sitting.

He immediately investigated.
Those would be Davis' fingers in the box of peppermint bark.
Then he inspected.
Then he ate it and guess what?  He liked it.

Another peppermint bark consumer is born.

Homemade Peppermint Bark
(makes copius amounts of Bark and trust me, you cannot make too much)

Ingredients
20 ounces white chocolate, coarsely chopped
20 ounces semi-sweet chocolate, coarsely chopped
2 teaspoons peppermint extract
12 tablespoons heavy cream
30-40 peppermint candies, crushed

Details
Line two 9x12 baking sheets with silpat mats or parchment paper

Coarsely chop the semi-sweet chocolate and then the white chocolate.  Keep them seperate.

In a double boiler, add the heavy cream to the chopped chocolate.  Stir continuously while chocolate melts to keep it from scorching.  Once smooth, mix in peppermint extract and remove melted chocolate from double boiler and spread the chocolate on the prepared baking sheets using a spatula.  Chill in the refrigerator for 20 minutes.

While the semi-sweet chocolate layer is chilling, melt the white chocolate in the double boiler, stirring continuously until melted.

In a ziploc bag, place peppermint candies and wrap bag with a dish towel.  Using a meat tenderizer or other adequate tool, smash the candies until they are almost dust.  Set aside.

Once melted, set aside and once the semi-sweet chocolate is hardened, pour the white chocolate over the semi-sweet chocolate and smooth with a spatula.

Sprinkle with crushed peppermint candies.  Return baking sheets to the refrigerator to chill and harden.

Once hardened, use a knife to cut apart the peppermint bark.